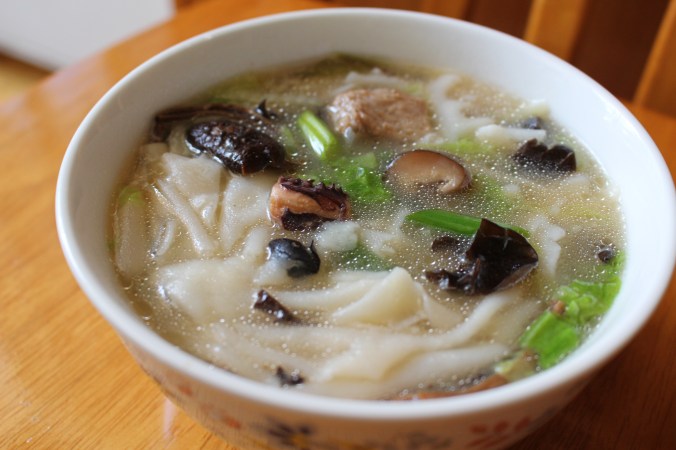
锅边

IMG_3684.JPG

锅边又叫鼎边锉,是福州非常出名的一道小吃。吃的时候一般配油条,虾酥,芋头糕之类的油炸品。 可以说没有吃过锅边的福州人一定是假福州人。 对于福州人来说,这就是最地道的福州早餐了。

材料:

沾米粉 1杯

水1杯

面粉 3汤勺

盐一小撮

将以上材料放一碗里搅拌均匀就是做锅边的浆了。


高汤  4杯

台湾小白菜 2 根(切丝)

葱1 条(切丝)

大干贝 2颗

干鱿鱼 1小片(3个手指头大,切丝)

五花肉丝 10 来丝

香菇 2朵(切丝)

黑木耳 3片(切丝)


WeChat Image_20170618223950

在一大号的不粘锅里炒五花肉丝到肉变色,加入干贝,鱿鱼丝继续炒2分钟后加入香菇,木耳和高汤煮7-8分钟。放入白菜和葱。

刚刚调好的浆再好好搅匀了拿一塑料的小碗装一些后沿着锅沿倒下去,要均匀的倒在锅沿上, 尽量不要倒到汤里去了,也不要倒太多。 这样做出来的锅边才不会太厚又很清爽。

如果火候够猛,你又倒浆倒的很薄, 盖子都不用盖,浆马上就变透明就卷边了(有时还自己就掉下去了)用个塑料的铲子把锅边铲到汤里。 如果锅子小,就一碗一碗的做,如果锅子大点的就继续在锅沿上倒浆重复上面的步骤。 一般也就重复3 遍, 放锅里煮太久锅边会煮的跟浆糊一样也不好吃。加虾油或鱼露(建议不要用盐代替)鸡粉和白胡椒粉调味。

喜欢比较稀一点的就加多点高汤,一般外面卖的都很稀。国内的都是用鼎来做,一次可以做一大锅,而且火够大做的也特别的快。 如果没有信心怕把浆倒到汤里的,也没有关系,将浆倒到平底的不粘锅里烧熟了以后再倒到汤里煮一下也是可以的。 一般外面卖的都喜欢用旧米来磨浆做,旧米没有粘度了这样做出来的锅边很清爽。但是缺点是吃起来比较硬。 我试过只有粘米粉做的, 加地瓜粉做的,都没有今天加面粉的好吃。

以下是网络图片


images

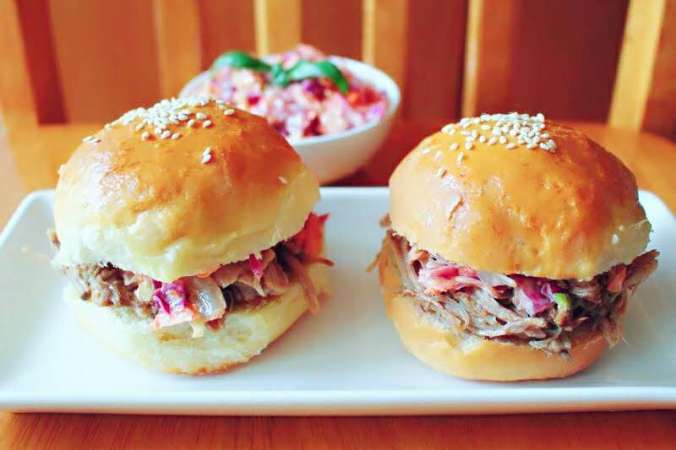
Pull Pork Burger/肉丝汉堡

WeChat Image_20170611215934

Ingredients

Pulled pork:

  • 4 pounds pork shoulder roast
  • 1 cup barbeque sauce
  • 1/2 cup apple cider vinegar
  • 1/2 cup chicken broth
  • 2 tablespoons light brown sugar
  • 1 tablespoon yellow mustard
  • 1/3 tsp salt
  • 1 tablespoon Worcestershire sauce
  • 1 tablespoon chili powder
  • 1 extra large onion, chopped
  • 2 large cloves garlic, crushed
  • 2 springs rosemary
  • 12 hamburger buns, split

Cole Slaw:

  • ¼ head green cabbage, finely shredded
  • ¼ head red cabbage, finely shredded
  • 1 small carrot, finely shredded
  • 6 tbsps mayonnaise
  • 2 tbsps cider vinegar
  • 1tbsp sugar
  • Salt and freshly ground black pepper to the taste

Mix everything together and mix well. If you like me who doesn’t like raw cabbage, cook the cabbages in the boiling water for 2 minutes, then drop them into ice water. Make sure you squeeze all the water out of the vegetable before you mix it with other ingredients.

Here is the link for the burger buns:

https://caiqinchen.com/2016/02/16/%e9%9d%a2%e5%8c%85home-made-bread/

Pull Pork:

  1. Place the onion on the bottom of the slow cooker, then place the pork roast on top of it.
  2. Pour in the barbecue sauce, apple cider vinegar, and chicken broth in a large bowl. Stir in the brown sugar, yellow mustard, Worcestershire sauce, chili powder, salt, garlic, and rosemary. Mix everything well then pour the sauce to the pork.  Cover and cook on medium until the roast shreds easily with a fork, 7 to 8 hours. It may seem too little sauce at the beginning, but the sauce will become more and more after cooking.
  3. Remove the roast from the slow cooker, and shred the meat using two forks. Get the juice into a blender and blend it until smooth, then pour it to a saucepan and cook with medium heat to thicken it up.
  4. Spoon pork on to the buns and top with some cole slaw.

The left over BBQ sauce is so yummy, I store it for burger or sandwich later.

WeChat Image_20170611215927


This slideshow requires JavaScript.

WeChat Image_20170611220606

猪肉丝:

4磅猪肩膀肉

1杯烧烤酱

1/2 杯苹果醋

1/2 杯鸡汤

2汤匙红糖

1汤匙黄芥末

1/3 茶匙盐

1汤匙伍斯特汁(牛排酱汁)

1汤匙辣椒粉

1特大洋葱, 切碎

2瓣大蒜, 切碎

2小条迷迭香

12个汉堡包


把洋葱放在慢炖锅的底部, 然后把烤猪肉放在上面。

倒入烧烤酱, 苹果醋, 鸡汤在一个大碗里。搅拌入红糖, 黄色芥末, 伍斯特酱, 辣椒粉, 盐, 大蒜, 和迷迭香。把酱料都拌匀后倒入放了猪肉的慢煮锅里。盖上盖子煮到用叉子容易就可以把肉弄碎, 7 到8小时。在刚开始煮的时候, 酱汁看起来可能太少, 但是开煮后酱汁会变得越来越多。

从慢炖锅里取出烤肉, 用两个叉子把肉弄碎。把酱汁倒入搅拌机中, 搅拌至光滑, 然后倒在平底锅上, 用中火煮, 使其变稠。

夹一些猪肉放在包子上再加一些卷心菜就可以开吃了。

剩下的烧烤酱, 我会用瓶子装起来以后吃汉堡或三明治的时候再用。


高丽菜沙拉:

¼颗白高丽菜, 切碎

¼颗红高丽菜, 切碎

1个小胡萝卜, 切碎

6汤匙蛋黄酱

2汤匙苹果醋

1大勺糖

盐和新鲜黑胡椒粉少量调味

把所有东西混合在一起, 拌匀。如果你像我不喜欢吃生高丽菜, 把菜放在沸水中煮2分钟, 然后把它们放进冰水中。在你把蔬菜和其他配料混合之前, 一定要把所有的水都挤出来。

以下是汉堡包子的链接:

https://caiqinchen.com/2016/02/16/%e9%9d%a2%e5%8c%85home-made-bread/


Blue Berry Sponge Cake/蓝莓海绵蛋糕

I baked 3 cakes in the last 2 days. I want to bake a cake that has the really soft but rich texture. I am still trying to find the right recipe…

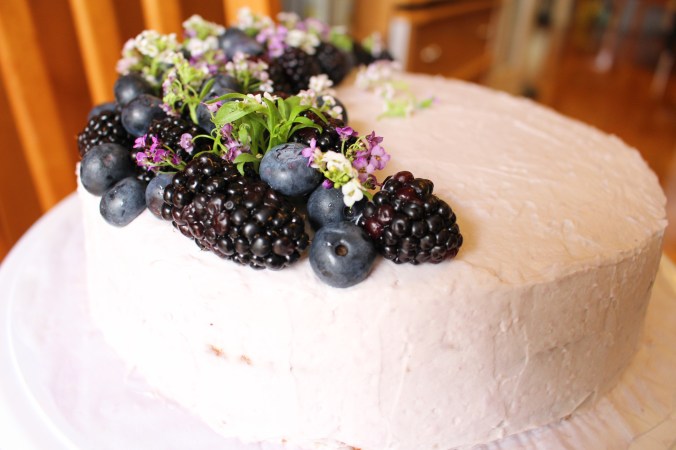
Here are the cakes:
IMG_3573

Blue berries syrup:

½ pint blue berries

3tbsps sugar

1tbsp water

Mix all the ingredients above in a cooking pan, bring it to boil then reduce the heat to low and cook for 10 minutes. Filter the mixture and set the syrup aside.


Blue berries cream cheese Frosting:

( good for 2 – 6″ cakes)

1 1/4 cups heavy whip cream
1/2 cup sugar
1 tsp vanilla extract
12 oz cream cheese

3 tbsps blue berries syrup

Whip cream cheese and blue berries syrup until it is creamy and fluffy.

Mix whip cream, sugar and vanilla extract together in a big mixing bowl and whip on high speed until soft peaks form.
Add the cream cheese mixture to the whipped cream and whip until stiff peaks form. Set whipped frosting in the refrigerator.
Cake:

Ingredients:

6 eggs at room temperature,

Cake flour 200 grams, sifted

Sugar 150 grams

Vegetable oil or melted butter 50 grams

Baking:

Preheat oven to 355Fahrenheit

Break the whole eggs into a large mixing bowl

Then pour the sugar into the bowl

Take a big cooking pan with some hot water in it, leave the bowl on top of it (the bottom of the bowl touches the hot water) and whip the eggs.

With the constant whipping, the egg will produce big bubbles; then it will become thicker.

Whip the egg until when you pick up the mixer the egg batter drop down will not disappear immediately and you can use it to draw clear lines. (The whole process takes about 12 minutes depends on the power of your mixer).

Add the flour to the batter in 3 times; with the help of a rubber scraper carefully stir it from the bottom to the top. Do not mix it in a circle direction to avoid defoaming of the egg.

Pour the vegetable oil or melted butter into the cake batter and continue to stir from the bottom to the top.

Spread the parchment paper on the bottom of the baking pan and pour the cake batter into it.

Bend the baking pan on the kitchen counter really hard a few times to get the air out. Bake in the preheated oven for 15-20 minutes. To see if it is ready, use a toothpick to insert inside the center of the cake if it comes out clean then it is ready.

Assemble:

Let the cake to cool down completely

Cut the cake into 3 even slices

Leave the first slice on a cake bottom pad and put it on the cake turntable

Add some frosting on top of the first cake slice, with the help of spatula, smooth the frosting on the surface evenly. Then add the second slice and repeat the same procedure until all 3 layers are stacked up. Use an icing decorator to smooth the surface and the side of the cake. Decorate the cake with your favor berries or fruits.

WeChat Image_20170606214210

WeChat Image_20170606214218

蓝莓糖浆:

½品脱蓝莓

3大勺白 糖

1大勺 水

把上面的所有配料倒入锅里, 把它煮开, 然后把把火调小 煮10分钟。过滤混合物, 把糖浆放在一边备用。

蓝莓奶油奶酪霜:

(够做2 个6寸的蛋糕)

1 1/4 杯奶油

1/2 杯白糖

1茶匙香草精

12盎司奶油奶酪

3汤匙蓝莓糖浆

用搅拌器打奶油奶酪和蓝莓糖浆, 直到它变蓬松。

将奶油, 糖和香草精倒入一个大的碗里用搅拌器高速搅拌, 直到奶油变浓稠。提起搅拌器奶油仍会滴落。

加入奶油奶酪混合物到奶油里继续打, 直到凝固硬性发泡。放在冰箱里备用。


蛋糕:

蛋糕的食谱是君之的, 几乎没有改变。 http://blog.sina.com.cn/s/blog_4a5089ff0100cdet.html

配料

鸡蛋6个, 室温

低筋面粉200克,

细砂糖150克,

植物油或融化的黄油50克
烘焙:烤箱中层355 华氏度,15-20分钟

制作过程

准备一个稍微大点的盆,鸡蛋打入盆里。
再将白糖倒入。
取一个锅,锅里放入热水,把打蛋盆坐在热水里,并用打蛋器将鸡蛋打发。
随着不断的搅打,鸡蛋液会渐渐产生稠密的泡沫,变得越来越浓稠。

将鸡蛋打发到提起打蛋器,低落下来的蛋糊不会马上消失,可以在盆里的蛋糊表面画出清晰的纹路时,就可以了。(整个打发的过程约需要12分钟, 看你的打蛋器的马力有多大)
分3次倒入低筋面粉,用橡皮刮刀小心地从底部往上翻拌,使蛋糊和面粉混合均匀。不要打圈搅拌,以免鸡蛋消泡。
在搅拌好的蛋糕糊里倒入植物油或者融化的黄油,继续翻拌均匀。
在烤盘里铺上油纸,把拌好的蛋糕糊全部倒入烤盘。
把蛋糕糊抹平,端起来在地上用力震几下,可以让蛋糕糊表面变得平整,并把内部的大气泡震出来。把烤盘送入预热好355度的烤箱,烤15-20分钟,用牙签插入蛋糕内部,拔出来后牙签上没有粘上蛋糕,就表示熟了

组装:

让蛋糕完全冷却下来。

把蛋糕横切成3片

将第一个切片放在蛋糕垫上, 再放在蛋糕转盘上。

在第一片蛋糕上加一些奶酪霜, 在刮刀的帮助下, 均匀地抹在蛋糕上。然后将第二个切片覆盖上去, 重复同样的步骤, 直到所有3层蛋糕片都堆起来。使用一把刮蛋糕奶油专用刮刀把蛋糕的面和边都刮平。用你喜欢的浆果或水果装饰蛋糕。

WeChat Image_20170608215923

WeChat Image_20170608215929

WeChat Image_20170608205046

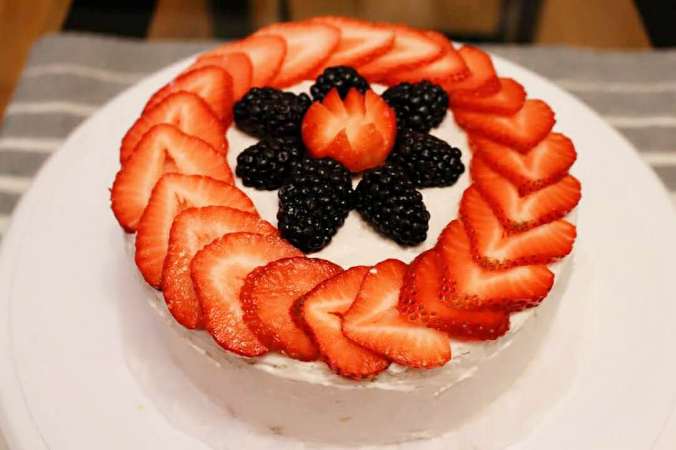
I didn’t have enough frosting for this last one, so this one I added some strawberries to the frosting and make a sandwich cake. Lol…

WeChat Image_20170608205250

My Day To Day Food/日常普通的三餐

People think that I am so lucky eating all the good food and never gain weight. Is it possible that someone is eating anything he/she wants and not gaining any weight? I think it is either this person has some kind of disease or this person is VERY VERY VERY lucky. And I am not one of those people. I can gain weight easily just like anyone of you. Then you may ask the question all my friends asking me: then how come I still look kind of skinny? First of all, I am not skinny ( I may look like it). Secondly, I am not eating good, fancy, fatty food every day. On my day to day life, I am a very healthy eater, and I exercise regularly. I’ve been running since 2005.

From now on I am going to post some of my Normal food pictures with or without recipes. A lot of times after I finish cooking something, I realize the food turns out to be really good, but I don’t remember how much ingredients/spices I use. So I don’t post it here. I’ve seen some recipes telling people the amount of ingredients/spices used by saying about, some, maybe, I don’t like it. When I post the recipe, I want every ingredients I use to be accurate, so when a beginner wants to cook the dish, it will be easy for he/she to fellow.

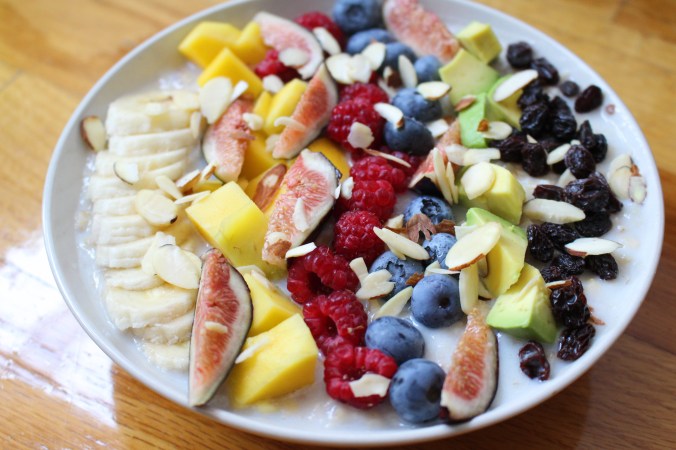
Oat meal is one of my favorite foods, on average I eat more than once a week. Today I am going to show you the oat meal I cook for breakfast. Remember beautiful color and nice presentation will always make a dish more attractive, you will see what I mean. Below are the ones I eat over the weekend when I have time to decorate them.

IMG_1131.JPG

I also cook savory oatmeal too.

IMG_2025

Ok, so oatmeal I eat on most of week days will look like this… I usually add chia seeds. Plain!!!! Sometimes I add some brown sugar. Do you still want to eat it? Lol…

WeChat Image_20170608214653


人们认为我很幸运, 吃了那么多的美食从不发胖。有没有可能有人可以吃他/她想要的所以东西而不发胖呢?我认为要不就是这人有某种疾病或这个人是非常非常非常的幸运。我不是以上的任何一种。我跟你们任何人一样容易变胖。那么你可能会问我所有的朋友经常问我的问题: 那为什么我看起来还是那么瘦?首先, 我不瘦 (我可能看起来像)。第二, 我也不是每天吃香喝辣。在我的生活中, 我是一个饮食非常健康的人, 而且我还经常锻炼。我从2005年就开始跑步了
从现在开始, 我要贴一些我平常吃的食物图片(也许有些没有食谱)。很多时候, 我煮完一道菜后才发现这道菜很好吃, 但我不记得用了多少配料/酱料。所以我不会张贴在这里。我曾看到有些食谱告诉人们材料用 一些, 适量, 我不喜欢这样写。当我张贴食谱时候, 我想把所有的量都说到最精准, 所以当一个初学者想学做的时候会很容易上手。
燕麦是我最喜欢的食物之一, 平均每周吃最少一次。今天我要给你们看一些我做的燕麦早餐。记住美丽的颜色和 精心的摆盘将使一个菜更有吸引力, 看了图片你会明白我的意思的。