Fruit Jello/水果果凍

I bought a lot of mango recently, so I need to come up with some more ways of eating them. I found out I have a bag of Agar-agar powder at home so I decided to make fruit jello for mother’s day dessert. This tastes much better than store bought jello, very fruity!!! Most importantly you can adjust the sugar according to your own preferences. The ratio of agar-agar powder to the water/juice/puree is 1gram : 120 gram. You can use other kind of juice, fruit to make this.

IMG_6115

Mango layer

  • Mango puree 260g
  • Water 220g
  • Sugar 2 tbsps
  • Agar-agar powder 4g

Strawberry layer

  • Strawberry puree 120g
  • water 240g
  • sugar 4tbsp
  • Agar-agar powder 3g

Coconut layer

  • Coconut milk 200g
  • Water 160g
  • Sugar 4tbsp
  • Agar-agar powder 3g

Add agar-agar powder and sugar to the cold water and bring it to boil, while cooking stir the mixture constantly.

Turn the heat off and let it cool down a bit to warm temperature.

Add the mixture to the mango puree and mix well.

Pour it to a container (I used a square glass one)

Leave it in the refrigerator for 15-20 minutes.

Repeat the above steps for strawberry layer, then pour it over the mango layer. leave it in the refrigerator for 15 minutes.

Repeat the same for coconut layer.

I added some Mango chunks to the mango layer, but you don’t have too. I just want to use more mango.

IMG_6135

Agar Agar Powder Asian Food Desserts Vegetable Dietary Fiber For Vegans 25 g.


芒果層

芒果泥260 克
水220克
糖 2 湯匙
燕菜精4克

草莓層

草莓泥120克
水240克
糖4湯匙
燕菜精3克

椰奶層

椰奶200克
水 160 克
糖4湯匙
燕菜精3克

加入燕菜精和糖到冷水中開火煮開, 同時要不斷攪伴。

煮開后把火關掉, 讓它冷卻一點。

將混合物加入芒果泥中, 攪拌均勻。

把它倒到一個容器裡 (我用了一個方形的玻璃容器)

把它放在冰箱裡15-20分鐘。

草莓層也是重複上述步驟, 做好晾涼後將其倒在芒果層上。把它放在冰箱裡15分鐘。

椰奶層重複同樣的步驟。

我在芒果層增加了一些芒果塊, 但你也可以不放。我只想用多一點芒果。

IMG_6118

Mango Tapioca/芒果西米露

IMG_0433

This is something really delicious and easy to make, only it will take sometime time to prepare.

Chinese purple sticky rice 1 cup

Small tapioca Pearl 1/2 cup

2 big strawberries

1 mango

Coconut milk 2/3 cup

Coconut flavor Sugar 1/3 cup

Wash rice and cook it in a electronic pressure cooker for 18 minutes with 3 cups water.

Bring 2 cups water to boil then add tapioca, turn the heat off and leave it for 30 minutes with a lid on.

Drain the water from tapioca then add 2-3 more cups fresh cold water and start cooking again. At this point, the center of tapioca is still white, by the time the water is boiling again, the white in the center will disappear. when the white is totally disappear, turn the heat off and drain most of water.(depend on how thick do you want your dessert to be, don’t make it too thin though)

Add coconut milk and coconut sugar and bring it to boil again. (adjust the amount of  coconut milk and sugar according to your own preferences)

This dessert can be served hot or cold. If you want to eat it cold (more common) you should cook it with a little more water because it will absorb water while it cools down.

Scoop some purple rice by using a ice cream scoop and add it to tapioca, garnish it with strawberries and mango.

IMG_0447

这是一道很好吃的甜点, 很容易做, 只是需要一些时间来准备。

中国紫糯米1杯

木薯西米1/2 杯

2个大草莓

1个芒果

椰奶2/3 杯

椰味糖1/3 杯

清洗糯米, 用电压力锅加用3杯水煮18分钟。

2杯水煮沸, 然后加入西米, 关火盖盖子静置半个小时。

将水从木薯中篦出, 再加2-3 杯新的冷水, 再开始煮。此时, 木薯的中心仍然是白色的, 当水再次煮开时, 中间的白色就会消失。当白色完全消失, 关火并篦掉大部分水。(取决于你希望你的甜点有多稠, 当然也不要让它太稀)

加入椰奶和椰子糖, 再次把它煮沸。(根据您的喜好调整椰奶和糖的量)

这道甜点可以冷吃或热吃。如果你想吃冷的 (更常见), 你应该多加一点水煮, 因为它冷却下来会吸收很多水。

用冰淇淋勺舀一些紫糯米加入西米中, 用草莓和芒果点缀。

Mango Yogurt Fruit Cup/芒果酸奶水果杯

IMG_0382

IMG_0383

I Didn’t think I was going to post it until someone asked me for recipe. He asked me what was the name of it and I actually didn’t have one. I love fresh fruits and their beautiful colors, I am trying to make any kind of food look beautiful, and this is actually successful! I didn’t think I would post it was because this is so simple, it doesn’t require cooking and can be done in no time.

I was making a mango crepe cake the other day, and I had some mango puree left, so I decided to make this: mango yogurt fruit cup.

On the bottom was mango puree, then fat free yogurt, followed by another layer mango puree, then mango whipped cream (heavy cream whip until firm peak then add some mango puree), finally topped with some fresh fruit.

If you don’t have time to do the whipped cream layer, just skip it by adding more yogurt instead. I sometimes add nuts or chia seeds in between too. But of course fresh fruits will always be a plus to this. Enjoy!


IMG_0231

IMG_9564

IMG_9525

我之前都没想过张贴出来, 直到有人问我要食谱。他问我这叫名字, 我都答不上来。我喜欢新鲜的水果和他们美丽的颜色, 我很喜欢琢磨着怎么使任何一种食物看起来漂亮而让人有食欲, 这应该算是成功的例子!我不认为我会张贴它是因为这个非常简单, 感觉根本都没有贴的必要。

那天我在做芒果千层蛋糕, 我还有剩一些芒果酱, 所以我决定做这个: 芒果酸奶水果杯。

最底部是芒果浆, 然后是无脂酸奶, 然后是另一层芒果浆, 然后芒果生奶油 (奶油打到硬性发泡然后加一些芒果浆), 最后加一些新鲜水果在面上。

如果你没有时间做的奶油层, 跳过它加多一层酸奶代替也可以。有时我也会在两者之间加入坚果或奇亚籽。但当然新鲜水果将永远是最好的。

Guacamole/鳄梨沙拉酱

WeChat Image_20170706221405

One large ripe avocado

½ Roma tomato, diced

2tbsps diced red onion

1 tablespoon finely chopped fresh cilantro

½ tbsp. lime juice

Salt 1/5 tsp

Smash avocado with a fork after peeled and pitted

When it is smooth, add in lime juice, salt to the taste (you can add some black pepper too)

Finally add the diced tomato, cilantro and red onion and mix well. Refrigerate for a couple of hours.

WeChat Image_20170706221358

WeChat Image_20170706221350

一个熟透的大奶油果

半个罗马番茄(切小粒)

2大勺的紫色洋葱(切小粒)

一大勺切碎的香菜

半大勺的青柠汁

盐1/5茶勺

奶油果去皮,去核后用一把叉子来压烂

等到压的很烂了之后, 加人青柠汁,盐调味(也可加些黑胡椒粉)

最后加入切粒的番茄,洋葱和香菜, 搅拌好后放冰箱冷藏一两个钟头。

Blue Berry Sponge Cake/蓝莓海绵蛋糕

I baked 3 cakes in the last 2 days. I want to bake a cake that has the really soft but rich texture. I am still trying to find the right recipe…
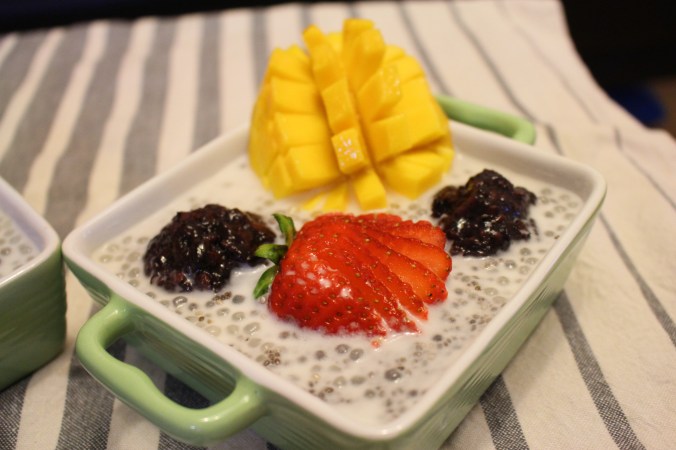
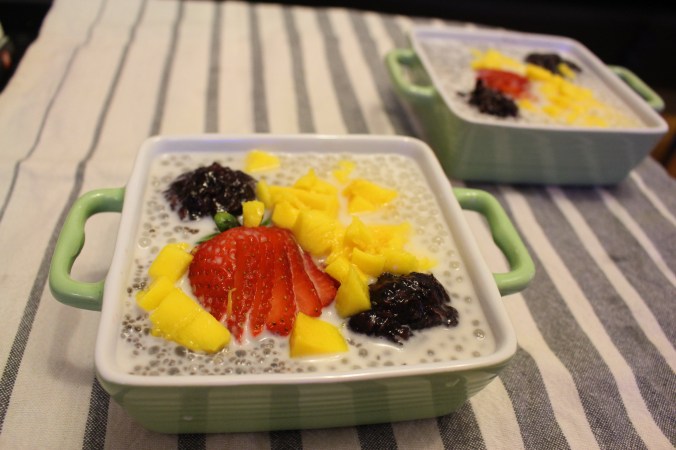
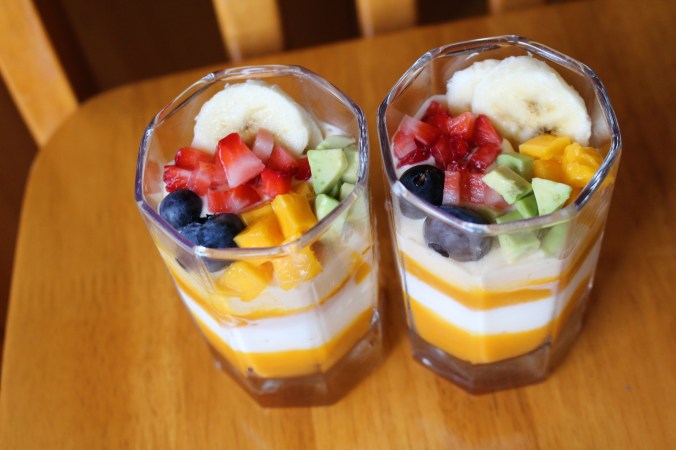
Here are the cakes:

IMG_3573

Blue berries syrup:

½ pint blue berries

3tbsps sugar

1tbsp water

Mix all the ingredients above in a cooking pan, bring it to boil then reduce the heat to low and cook for 10 minutes. Filter the mixture and set the syrup aside.


Blue berries cream cheese Frosting:

( good for 2 – 6″ cakes)

1 1/4 cups heavy whip cream
1/2 cup sugar
1 tsp vanilla extract
12 oz cream cheese

3 tbsps blue berries syrup

Whip cream cheese and blue berries syrup until it is creamy and fluffy.

Mix whip cream, sugar and vanilla extract together in a big mixing bowl and whip on high speed until soft peaks form.
Add the cream cheese mixture to the whipped cream and whip until stiff peaks form. Set whipped frosting in the refrigerator.
Cake:

Ingredients:

6 eggs at room temperature,

Cake flour 200 grams, sifted

Sugar 150 grams

Vegetable oil or melted butter 50 grams

Baking:

Preheat oven to 355Fahrenheit

Break the whole eggs into a large mixing bowl

Then pour the sugar into the bowl

Take a big cooking pan with some hot water in it, leave the bowl on top of it (the bottom of the bowl touches the hot water) and whip the eggs.

With the constant whipping, the egg will produce big bubbles; then it will become thicker.

Whip the egg until when you pick up the mixer the egg batter drop down will not disappear immediately and you can use it to draw clear lines. (The whole process takes about 12 minutes depends on the power of your mixer).

Add the flour to the batter in 3 times; with the help of a rubber scraper carefully stir it from the bottom to the top. Do not mix it in a circle direction to avoid defoaming of the egg.

Pour the vegetable oil or melted butter into the cake batter and continue to stir from the bottom to the top.

Spread the parchment paper on the bottom of the baking pan and pour the cake batter into it.

Bend the baking pan on the kitchen counter really hard a few times to get the air out. Bake in the preheated oven for 15-20 minutes. To see if it is ready, use a toothpick to insert inside the center of the cake if it comes out clean then it is ready.

Assemble:

Let the cake to cool down completely

Cut the cake into 3 even slices

Leave the first slice on a cake bottom pad and put it on the cake turntable

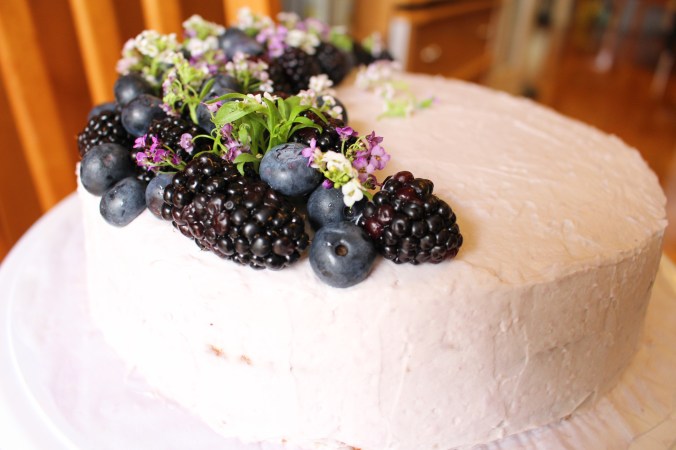
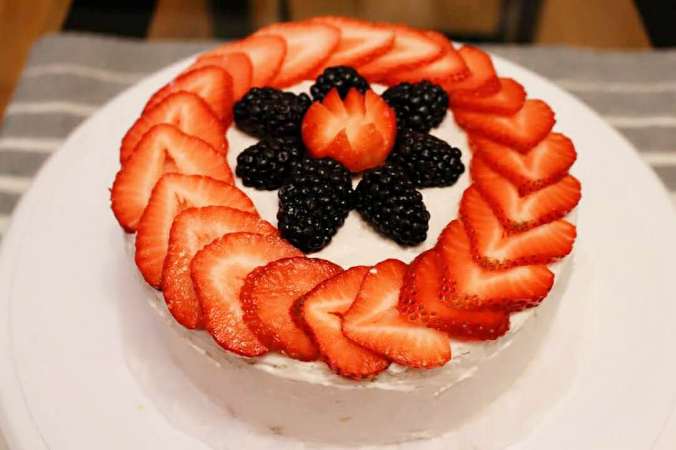
Add some frosting on top of the first cake slice, with the help of spatula, smooth the frosting on the surface evenly. Then add the second slice and repeat the same procedure until all 3 layers are stacked up. Use an icing decorator to smooth the surface and the side of the cake. Decorate the cake with your favor berries or fruits.

WeChat Image_20170606214210

WeChat Image_20170606214218

蓝莓糖浆:

½品脱蓝莓

3大勺白 糖

1大勺 水

把上面的所有配料倒入锅里, 把它煮开, 然后把把火调小 煮10分钟。过滤混合物, 把糖浆放在一边备用。

蓝莓奶油奶酪霜:

(够做2 个6寸的蛋糕)

1 1/4 杯奶油

1/2 杯白糖

1茶匙香草精

12盎司奶油奶酪

3汤匙蓝莓糖浆

用搅拌器打奶油奶酪和蓝莓糖浆, 直到它变蓬松。

将奶油, 糖和香草精倒入一个大的碗里用搅拌器高速搅拌, 直到奶油变浓稠。提起搅拌器奶油仍会滴落。

加入奶油奶酪混合物到奶油里继续打, 直到凝固硬性发泡。放在冰箱里备用。


蛋糕:

蛋糕的食谱是君之的, 几乎没有改变。 http://blog.sina.com.cn/s/blog_4a5089ff0100cdet.html

配料

鸡蛋6个, 室温

低筋面粉200克,

细砂糖150克,

植物油或融化的黄油50克
烘焙:烤箱中层355 华氏度,15-20分钟

制作过程

准备一个稍微大点的盆,鸡蛋打入盆里。
再将白糖倒入。
取一个锅,锅里放入热水,把打蛋盆坐在热水里,并用打蛋器将鸡蛋打发。
随着不断的搅打,鸡蛋液会渐渐产生稠密的泡沫,变得越来越浓稠。

将鸡蛋打发到提起打蛋器,低落下来的蛋糊不会马上消失,可以在盆里的蛋糊表面画出清晰的纹路时,就可以了。(整个打发的过程约需要12分钟, 看你的打蛋器的马力有多大)
分3次倒入低筋面粉,用橡皮刮刀小心地从底部往上翻拌,使蛋糊和面粉混合均匀。不要打圈搅拌,以免鸡蛋消泡。
在搅拌好的蛋糕糊里倒入植物油或者融化的黄油,继续翻拌均匀。
在烤盘里铺上油纸,把拌好的蛋糕糊全部倒入烤盘。
把蛋糕糊抹平,端起来在地上用力震几下,可以让蛋糕糊表面变得平整,并把内部的大气泡震出来。把烤盘送入预热好355度的烤箱,烤15-20分钟,用牙签插入蛋糕内部,拔出来后牙签上没有粘上蛋糕,就表示熟了

组装:

让蛋糕完全冷却下来。

把蛋糕横切成3片

将第一个切片放在蛋糕垫上, 再放在蛋糕转盘上。

在第一片蛋糕上加一些奶酪霜, 在刮刀的帮助下, 均匀地抹在蛋糕上。然后将第二个切片覆盖上去, 重复同样的步骤, 直到所有3层蛋糕片都堆起来。使用一把刮蛋糕奶油专用刮刀把蛋糕的面和边都刮平。用你喜欢的浆果或水果装饰蛋糕。

WeChat Image_20170608215923

WeChat Image_20170608215929

WeChat Image_20170608205046

I didn’t have enough frosting for this last one, so this one I added some strawberries to the frosting and make a sandwich cake. Lol…

WeChat Image_20170608205250

Smoothie/奶昔

img_1657

I have a lot of fruit at home, so this morning I decided to make some smoothie for breakfast. This is the first time I add durian to my smoothie, and it tastes so creamy with the strong smell of durian. Love the color so much!!! Yum Yum!!!

Soy milk 1 cup

Blue berry ½ pint

Pineapple a few pieces

Durian 2 small pieces

Blue berry yogurt  4 oz.

Black berry 10 pieces

Mix everything together in a blender and blend for one minute.

img_1659

我家有很多的水果,所以今天早上我决定做一些奶昔当早饭。这是首次将榴莲添加到我的奶昔里,味道好到不行!这颜值101 分😍!

豆浆 1 杯

蓝莓果 ½ 品脱

菠萝几块

榴莲 肉2 小块

蓝莓果酸奶 4 盎司。

黑莓果 10 只

在搅拌机中搅拌混合一分钟。

Strawberry Flower/草莓花

IMG_0696

I am not gonna take the credit from my beautiful sister who made this lovely strawberry flower.  Get a fresh and big strawberry and a sharp knife, starting from the bottom cut it layer by layer until you reach the top. Isn’t it beautiful!!! Good night everyone.

我不會把做這可愛的草莓花的功勞從我美麗的妹妹那拿走。要个又大又新鮮的草莓和一把锋利的刀,從底部一層又一層的往上切。 漂亮吧 !!!晚安了大家。