青团

材料:

糯米粉 500克

澄粉 80克

艾草 350克

小梳打粉 1 茶匙

豆沙 450 克

芋泥 450 克

油 20克

做法

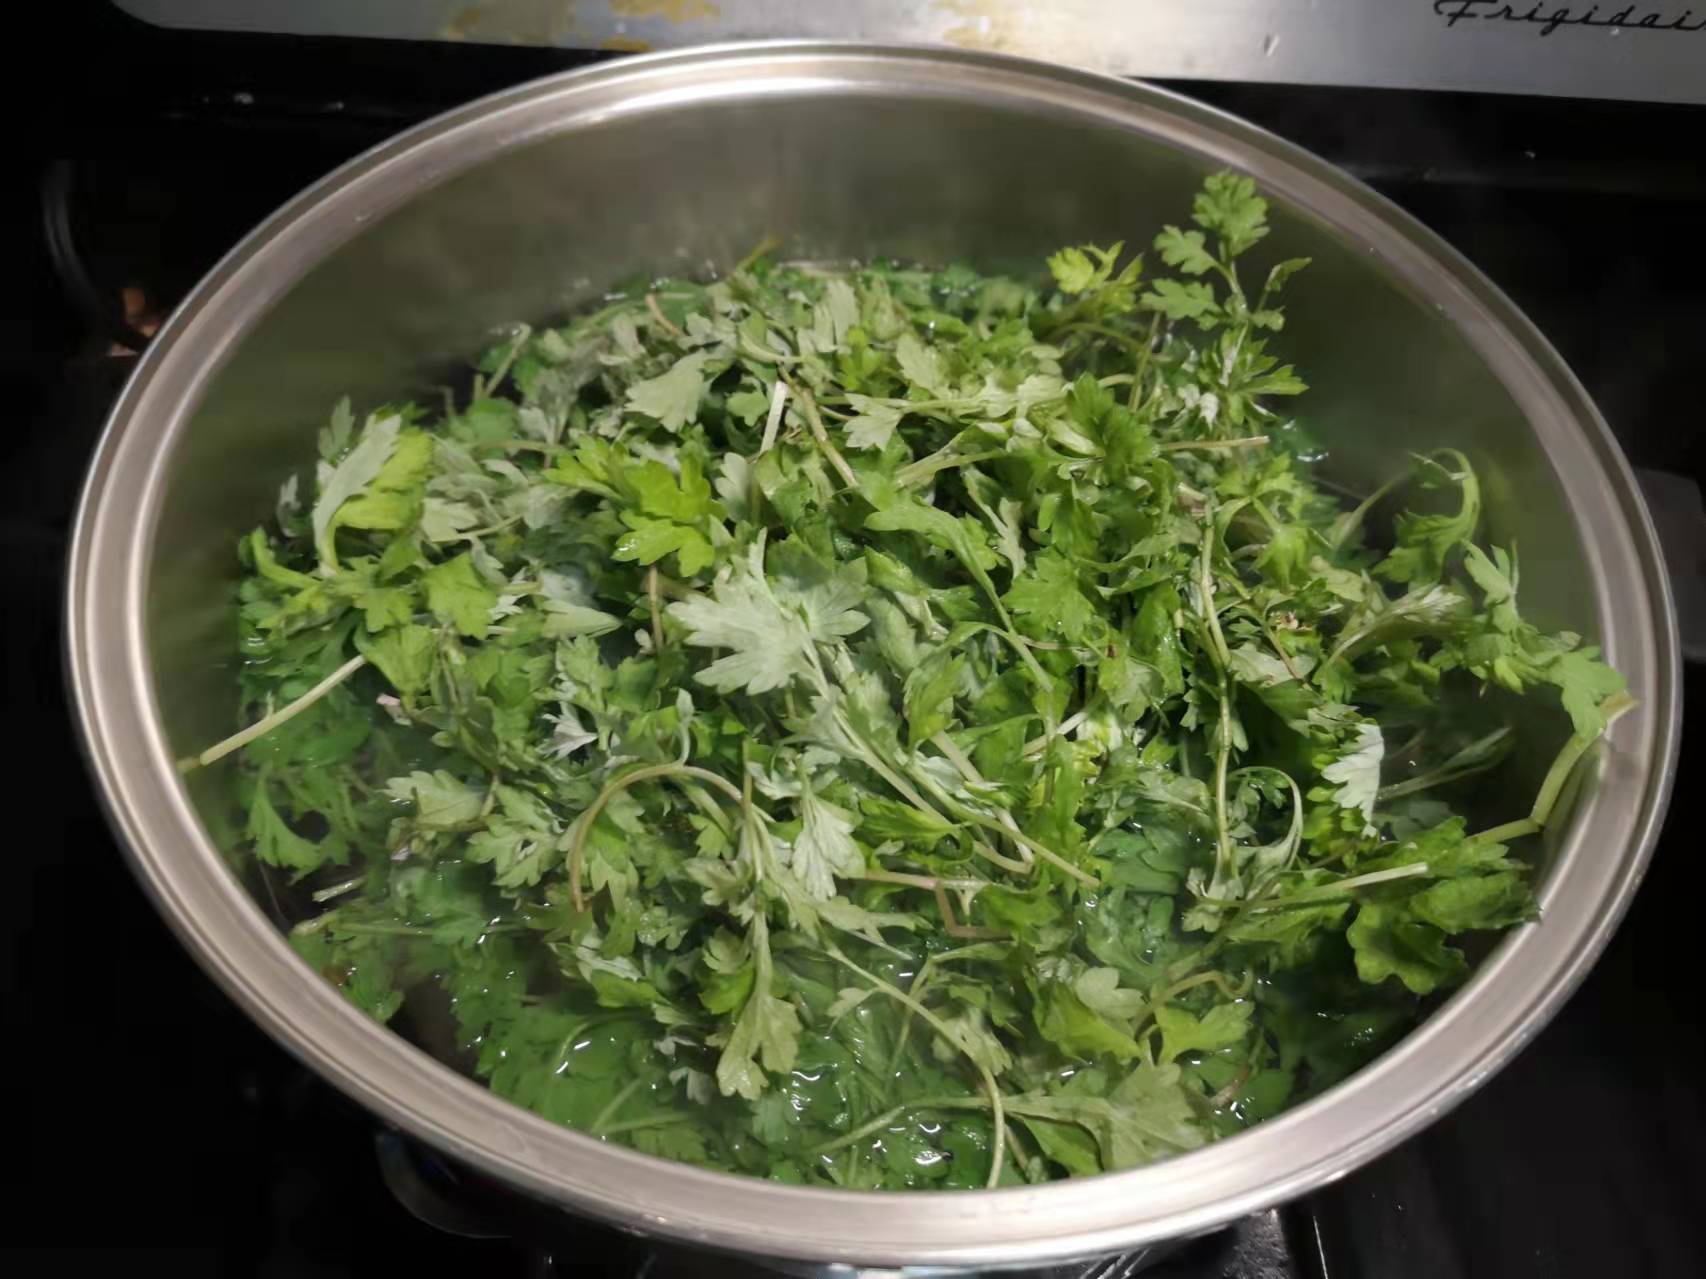
煮开一锅水,加入洗干净了的艾草和小梳打粉煮一分钟就吧艾草捞起来。

把艾草放入搅拌机里加入1.25杯刚刚煮艾草的滚水搅拌成泥。

把糯米粉和澄粉加到一个大盆里,加入艾草泥用筷子搅拌,等伴到差不多的时候再加入油用手搅拌均匀成团。

把豆沙和芋泥分成差不多30 克一粒, 皮差不多40克一粒。

像包汤圆一样用皮包馅 (加了滚水揉的粉很容易包的)

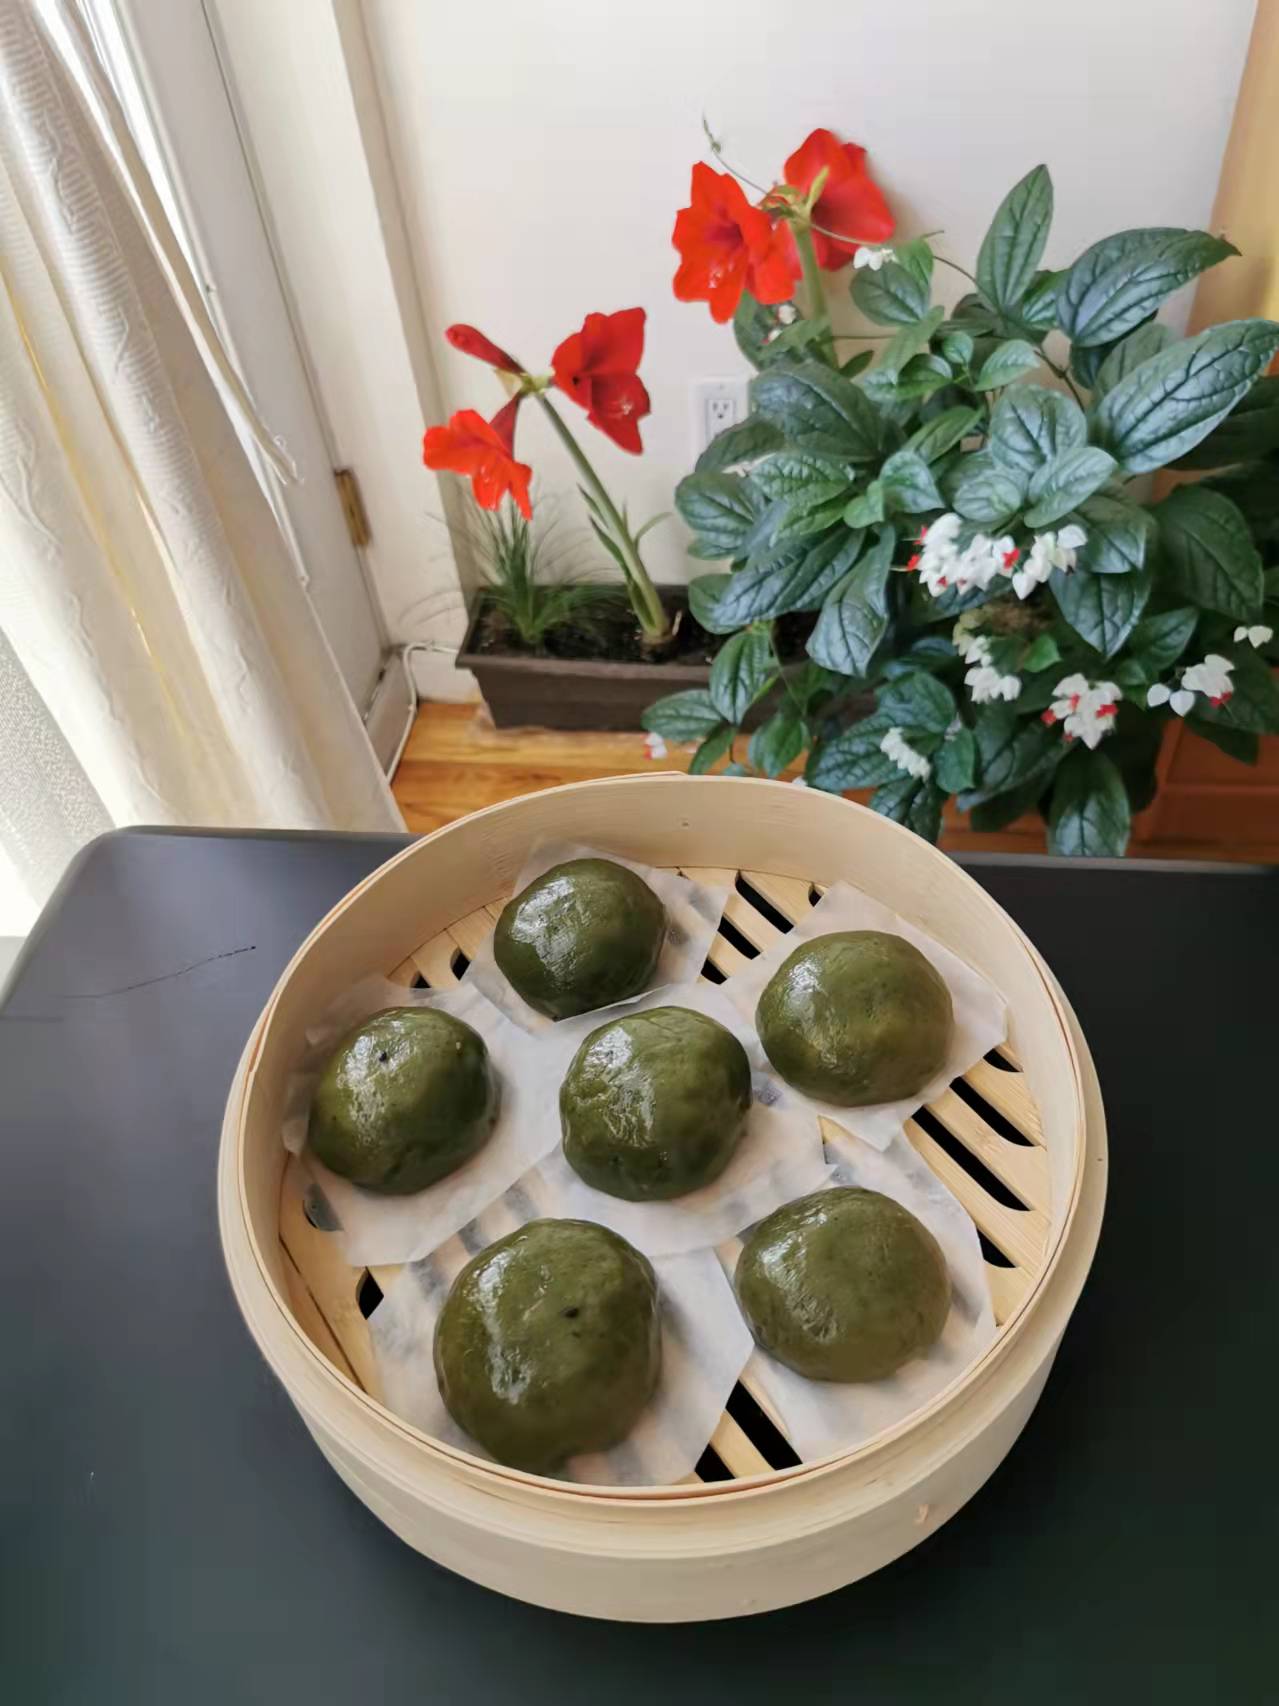
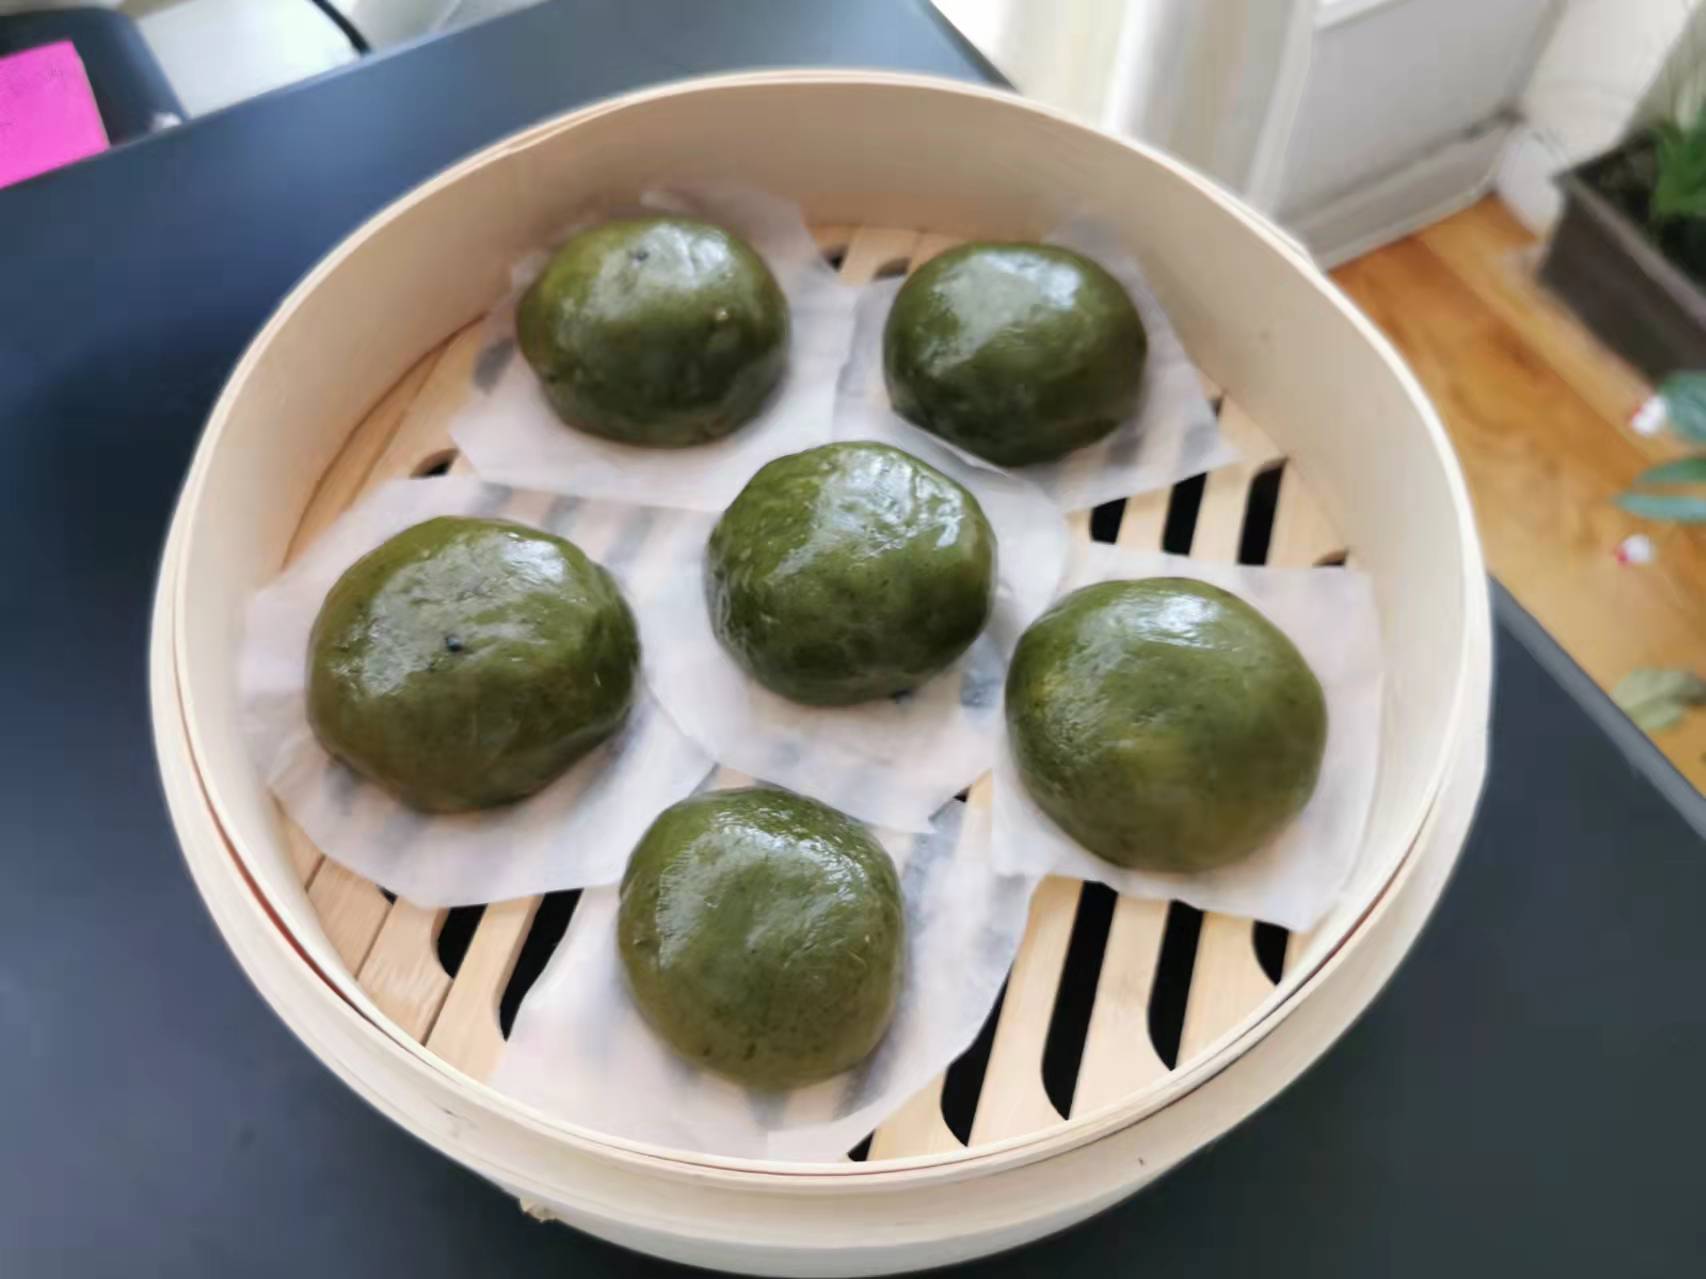
搓好后放在烤纸上放入竹蒸笼里滚水上锅蒸12分钟就好了。

你可以做各种不同的口味,我这次就做了 豆沙,芋头,咸蛋黄肉松,紫薯和白萝卜丝5种口味的。

Ingredients:

Glutinous rice flour 500 g

Wheat starch 80 g

Wormwood 350 g

Baking soda 1 teaspoon

Bean paste 450 g

Taro puree 450 g

Vegetable Oil 20 g

Directions:

Bring a pot of water to boil, add the washed wormwood and baking soda and cook one minute.

Put the wormwood in a blender and add 1.25 cups of boiling water that has just used to boil wormwood and blend into a puree.

Add glutinous rice flour and wheat starch together, then add wormwood mixture and stir with chopsticks ( it is hot), and when it is almost combined, add oil and knead by hands to form a soft ball.

Divide the bean paste and taro paste into about 30 grams each, and the wrapper about 40 grams each.

Wrap the stuffings with the wrappers like how we do rice balls (it should be very easy to wrap due to boiling water added to the flours)

After all are done put each on parchment paper and put them in bamboo steamer and steam over boiling water for 12 minutes.

雪花酥

食材:

200克棉花糖

100克小饼干

45克奶粉

10克绿茶粉

100克混合坚果

100克混合果干

50克黄油

做法:

奶油放不沾锅里用中小火融化,加入棉花糖搅拌。

等到黄油和棉花糖都很好的融合在一起了,加入已经过筛过混一起的奶粉和绿茶粉,关火继续搅拌到充分混合。

加入果干和坚果,继续搅拌。

最后加入小饼干。这个时候很难搅拌了,稍微把饼干拌入棉花糖中后改用戴了手套的双手来整形。

稍微整形后压入摸具中,等它彻底凉透就可以拿出来切了。

Ingredients:

200 g marshmallows

100 g small biscuits

45 g milk powder

10 g green tea powder

100 g mixed nuts

100 g mixed dried fruit

50 g Unsalted butter

Direction:

Melt the butter in a non-stick pan over medium-low heat, add marshmallows and stir.

When the butter and marshmallows are well combined together, add the milk powder and green tea powder that have been sifted together, turn off the heat and continue to stir until fully mixed.

Add the dried fruit and nuts and continue combining.

Finally add the small cookies. It’s hard to stir at this point, so mix the cookies into the marshmallows then use gloved hands to shape them.

After a little shaping, press into a tool box container, and when it is completely cool, you can take it out and cut it.

Pork Jerky/肉脯

Chinese New Year is coming, so I made this pork Jerky today for the holiday.

Ground pork 1150 g (lean pork preferred)

Oyster sauce 2 tbsps

Light soy sauce 2 tbsps

Dark soy sauce 1 tbsp

Cooking wine 2 tbsps

Sugar 100 g

Fish sauce 2 tbsps

Five spice powder 1tsp

White pepper powder 1/2 tsp

Red yeast rice powder 1tbsp (optional for color)

Direction:

Mix all the ingredients together and mix in one direction for 3,4 minutes or until meat is very sticky.

Refrigerate for at least 1 hour ( I did over night).

Preheat oven to 350F.

Get a piece of parchment paper the size of cooking sheet, add 1/5 of the meat to the center of the paper and use a spatula to spread it a little bit, then add a piece of plastic wrap or another piece of parchment paper over the meat. Use a rolling pin to roll the meat thinner over the paper to the size of the baking sheet.

Remove the plastic wrap or parchment paper from the top of the meat, and move the meat to a baking sheet.

Bake it in the preheated oven for 12 minutes, take it out and brush a layer of honey on the top. Go back into the oven and continue to bake another 5 minutes. (if you see broth now make sure to empty it from the baking sheet)

After 5 minutes, take it out again and flip the pork jerky to the other side and brush with a layer of honey too, also sprinkle some sesame seeds all over it. Go back to the oven for the last 5 minutes.

Take the pork jerky out and let it cool down, cut the irregular edges off, then cut them into any shape you want.

中國新年快到了,所以我今天做了這個豬肉脯。

豬肉碎 1150 g (偏瘦的豬肉)

蠔油 2 湯匙

生抽 2 湯匙

老抽 1 湯匙

料酒 2 湯匙

糖 100 克

魚露 2 湯匙

五香粉 1茶匙

白胡椒粉 1/2茶匙

紅曲米粉 1湯匙 (可不要,加顏色的)

做法:

將所有材料混合在一起,向一個方向混合攪拌3,4分鐘,或直到肉非常有粘性。

冷藏至少1小時(我冷藏過夜)。

將烤箱預熱至350華氏度。

拿一張和烤盤一樣大小的羊皮紙,將1/5的肉舀到紙的中央,然後用鏟子鋪開一點,在肉上加一塊塑料薄膜或另外一張羊皮紙。使用擀麵杖將肉擀開變薄到烤盤大小。

把蓋在肉上面的薄膜或者羊皮紙拿掉, 把肉移到烤盤上。

在預熱烤箱中烘烤12分鐘,拿出來,刷上一層蜂蜜。回到烤箱繼續烤5分鐘。(如果你現在看到湯汁, 要記得倒掉)

5分鐘后,再把它拿出來,把豬肉乾反轉到另一面,也刷一層蜂蜜,再撒上一些芝麻。放回烤箱烤最後5分鐘。

把豬肉乾拿出來,讓它冷卻,切掉不規則的邊緣,然後切成任何你想要的形狀。

Taro Dessert/芋頭酥

Ingredients 食材:

1. Water dough 油皮:(8个油皮面團)

150g All purpose flour 中筋面粉

30g Sugar 糖

60g Water 水

55g Pork lard 豬油

2. Oil dough 油酥: (8个油酥)

120g all purpose flour 面粉

4g Matcha powder 抹茶粉

65g pork lard 豬油

Taro fillings 芋頭馅儿:

600g taro 芋頭

Steam taro over boiling water until fork tender. /隔水蒸熟芋頭。

Add 50g of pork lard and 75g of sugar to the raro and mix well. (adjust the sugar according to your own taste)/加50克豬油和75克糖到芋頭裏攪拌均匀。(根據自己喜好增減糖的量)

Mix the ingredients for water dough and oil dough separated in two different containers.

After mix the water dough, knead it for at least 20 minutes like how we wash clothes. If you have a kitchen aid stand mixer at home it will be a great help.

Cover both dough with plastic wrap and let rest for 30 minutes.

Cut both into 8 even pieces, get one piece of water dough and use a rolling pin to roll it out and get one piece of oil dough and put in the center of the water dough and wrap it up like picture 2 below.

Roll the balls out to the oval sharp like picture 3 below.

Roll up the oval sharp dough and let rest for 20 minutes.

After 20 minutes, roll it again to the long strip like picture 6.

Roll the long strip up again and let rest for another 20 minutes.

After 20 minutes cut each roll into 2 even pieces like picture 10.

Flip the cut side up and use your palm to press it then use your rolling pin to roll it like when you make dumpling wraps (edge thinner than the center).

Add the evenly divided taro dough in the center of the wrap with the cut side down and wrap it up like picture 11 below.

將油皮面團和油酥的配料在兩個不同的容器中混合好。

混合好油皮面團后,搓揉至少20分鐘,就像我們洗衣服一樣。如果你有一個廚房攪拌機在家裡就用它代勞吧。

用塑料薄膜裝蓋住兩個麵糰,休息30分鐘。

把兩個麵糰都切成8個均勻的小團,將一塊油皮麵團用擀麵杖擀開, 放個油酥在上面包起來就像下面的圖片2。

把包起來的球擀開成橢圓形像下面的圖片3。

捲起橢圓形的麵糰,休息20分鐘。

20 分鐘后,再次擀開變長條形像圖片 6 。

再次捲起長條,讓休息20分鐘。

20分鐘后,將每個卷從中間切成2個一樣的大小像圖片10。

翻轉過來切面向上用你的手掌按壓它,然後用擀麵杖擀開像擀餃子包一樣中間厚邊緣薄。

放一塊均勻分劃好的芋頭在麵團上切面向下,然後像下面的圖片 11 一樣包裝起來。

Preheat the Oven 165°C(330℉)baking for 25 minutes 烤箱预热165°C(330℉)烤25分钟

Candied Walnuts/糖核桃

IMG_5899

Walnut 1 cup

Sugar 1/3 -1/2 cup

In a non-stick pan, add in sugar and cook with medium low heat for about 4 minutes or until sugar is golden brown, caramelize. (constantly stir)

Add the walnut in and turn the heat to low and constantly stir walnut in the sauce for about 5 minutes.

Pour the candied walnut to a big piece of parchment paper and make sure separate the walnuts, otherwise they will stick together after harden.

核桃 1 杯

白糖1/3-1/2 杯

在一個不沾鍋裏加入糖用中小火炒糖大概4分鐘到糖變成金黃色的糖漿。

加入核桃,調火到小火,不停的攪拌核桃大概5分鐘。

把炒好的糖核桃倒到一塊很大的烘烤紙上,記得把他們用筷子分開要不然一會兒涼了就分不開了。

Spring Rolls/春卷

IMG_5660

This is a simple bean sprout dish. It is a very traditional Fujianese dish I ate all the time when I was little.

One pound bean sprout

2 slices of ginger cut into thin strips

3 pieces dried mushroom

Pork or beef 3 oz.

Chinese celery 1/3 cup

Braised dried tofu 1 piece

Crab stick 2 sticks

Soak the dried mushroom in water for at least 1 hour, cut into strips.

Chinese celery, meat and dried tofu also cut into strips. Marinate the meat with salt, cooking wine and chicken bouillon.

Heat up a skillet then add 3 tbsps oil, add meat first and saute until the color turn white about 3 minutes.

Add ginger and continue to cook for a minute, then add the rest of ingredients. Stir fry for about 5 minutes.

Over the holidays, we used to buy spring roll wraps to make this Non-fried spring rolls with it. I used to love it so much. Nowadays, we have so much food in this country and I don’t really eat this roll any more. I don’t remember when was last time I ate it. It is good to bring some good memories back.

IMG_5676

IMG_5679

IMG_5675

Flavored Mochi/糯米糍

Since last time I made mochi, I always wanted to do it with different flavors. So this time I made some red bean paste as filling and made 3 different flavors: green tea, peanut meal and coco. They are all really good!!!

IMG_1236

Here is the recipes for red bean paste filling:

Red bean 225g

Water 2 cups

Sugar 250g

Vegetable oil 45g

Glutinous rice flour 15g + 3tbsps water (mix well)

Salt 1/3 tsp.

Soak the red bean in water overnight.

Cook the red bean and water in a pressure cooker for 15 minutes.

After the bean is cooled, pour half of it to a blender and blend until smooth.

Cook the bean paste in a cooking pan with the rest of ingredients until it is in thick paste condition, about 20-30 minutes. when it is ready, the bean paste will become whole big piece and not stick to the edge of the cooking pan.

The other half just use a potato smasher to smash it a little. then mix it with the other half that is already in paste form. I like some different texture in the filling, so I want some chunk red bean mix in it.

Here is the link to how to make mochi

https://caiqinchen.com/2018/06/27/peanut-mochi-%e8%8a%b1%e7%94%9f%e7%b3%af%e7%b1%b3%e7%b3%8d/

Make small size red bean paste balls.

Divide the flour dough into even size balls too.

Wrap the red bean paste inside the flour dough then cook in boiling water.

Wrap the cooked balls with the green tea powder, coco powder or peanut meal. ( don’t wrap them with too much of coco powder or green tea powder, they can be bitter)

Tips:

Mochi dough is very sticky, so it is extremely hard to shape them. It is very important to get a pair of gloves when you are working on them. Also add some Cooking oil to the dough will help to make the work easier too.

IMG_1243

IMG_1261

IMG_1269.JPG

Wonton With Chili Sauce/红油抄手

I make wontons quite often because it is easy and can be stored in the freezer for later when I don’t feel like to cook anything or when I am all out of idea what to eat. I used to work in Chinese restaurant for years, so making wonton is something easy for me. I can make 50 wontons in 10 minutes. It is getting hot recently, and I don’t feel like to eat wonton soup anymore so I make this wonton with chili sauce for summer time.

IMG_0665

It is same way of wrapping wontons and cook the wontons in the boiling water just like when we make wonton soup. But after they are cooked, use a strainer to get them out of boiling water then add the chili sauce.

https://caiqinchen.com/2016/03/27/%e4%ba%91%e5%90%9ewonton/

Here is how to make the sauce:

Light soy sauce 1tbsp

Balsamic vinegar 1tbsp

Water 2 tbsps

Sugar 1tsp

Chicken bouillon 1/3 tsps

Hot oil 1-2 tsps

Mix everything above together and it is the sauce for wontons. It is for one serving about 12-15 wontons.

wechat-image_20180701174949.jpg

这是同样的方法包装馄饨和煮馄饨。但在煮熟后, 用漏勺把它们从沸水中捞出, 然后加入红油酱汁。

https://caiqinchen.com/2016/03/27/%e4%ba%91%e5%90%9ewonton/

下面是如何制作红油酱汁:

生抽1汤匙

香醋1汤匙

水2汤匙

糖1茶匙

鸡精 1/3 茶匙

红油 1-2 茶匙

把上面的东西混合在一起, 这是馄饨的调味汁。这是一份的量大约12-15 馄饨。

Fruit Ice Bars/水果冰棒

IMG_0529

I saw someone else was making this fruit ice bars, and she made them look so colorful and delicious! I couldn’t wait to make some for myself too. Here they are: mango strawberries and yogurt ice bars. It is so easy even a cave man can do it. : )

I don’t think any kind of fruit can be used to make this, it has to be some sort of creamy texture fruits like berries, mango or something juicy like water melon.

I used mango, strawberries and plain yogurt. If you want to be healthy like me, don’t add anymore sugar to the fruit puree, or you can add sugar, honey as you may like. Also you’re free to choice any other kind of yogurt, you don’t have to stick with plain one. But I was very happy with mine. I pureed some mango and strawberries(separately of course), then layered them in the ice bar boxes with my favor plain yogurt, then put them in freezer overnight.  My mother thinks it is not sweet enough, but I love it just the way it is.

Imagine in a hot hot hot summer day and you make some of these, and you can enjoy it without any guilt! I can’t wait to make some  more with other fruits! Oh, don’t forget to invite you children to “help” you make some, they will want to eat more!!!

IMG_0525

我看到其他人在作这个水果冰棒, 她把冰棒做的五彩缤纷又美味!我迫不及待也做了一些。这些是: 芒果草莓和酸奶冰棒。这个容易到一个远古的洞穴人都会做。: )

我不认为任何一种水果都可以用来做这个, 必须是一些口感比较滑比较绵柔的水果, 比如浆果, 芒果或一些汁水比较多的如西瓜。

我这次用芒果, 草莓和普通酸奶。如果你像我这样提倡健康就不要再添加糖到水果浆里, 或者你可以加糖, 蜂蜜, 你喜欢就好。你也可以选择任何其他类型的酸奶。但我很喜欢我自己做的。我把一些芒果和草莓打成泥(当然是分开打的), 然后加我喜欢的纯酸奶把他们分层加入冰棒盒里, 然后放在冰箱里过夜。 我妈妈认为它不够甜, 但我喜欢。

想象一下在炎炎夏日, 你做了一些五颜六色的冰棒, 你可以多吃没有任何内疚!我迫不及待地想用其他的水果做更多!哦, 别忘了邀请你的孩子 “帮助 ” 你做一些, 他们会想吃更多哦!!!

Mango Yogurt Fruit Cup/芒果酸奶水果杯

IMG_0382

IMG_0383

I Didn’t think I was going to post it until someone asked me for recipe. He asked me what was the name of it and I actually didn’t have one. I love fresh fruits and their beautiful colors, I am trying to make any kind of food look beautiful, and this is actually successful! I didn’t think I would post it was because this is so simple, it doesn’t require cooking and can be done in no time.

I was making a mango crepe cake the other day, and I had some mango puree left, so I decided to make this: mango yogurt fruit cup.

On the bottom was mango puree, then fat free yogurt, followed by another layer mango puree, then mango whipped cream (heavy cream whip until firm peak then add some mango puree), finally topped with some fresh fruit.

If you don’t have time to do the whipped cream layer, just skip it by adding more yogurt instead. I sometimes add nuts or chia seeds in between too. But of course fresh fruits will always be a plus to this. Enjoy!


IMG_0231

IMG_9564

IMG_9525

我之前都没想过张贴出来, 直到有人问我要食谱。他问我这叫名字, 我都答不上来。我喜欢新鲜的水果和他们美丽的颜色, 我很喜欢琢磨着怎么使任何一种食物看起来漂亮而让人有食欲, 这应该算是成功的例子!我不认为我会张贴它是因为这个非常简单, 感觉根本都没有贴的必要。

那天我在做芒果千层蛋糕, 我还有剩一些芒果酱, 所以我决定做这个: 芒果酸奶水果杯。

最底部是芒果浆, 然后是无脂酸奶, 然后是另一层芒果浆, 然后芒果生奶油 (奶油打到硬性发泡然后加一些芒果浆), 最后加一些新鲜水果在面上。

如果你没有时间做的奶油层, 跳过它加多一层酸奶代替也可以。有时我也会在两者之间加入坚果或奇亚籽。但当然新鲜水果将永远是最好的。