Ingredients:
Glutinous rice 5 lbs
Water 4.5 quarts
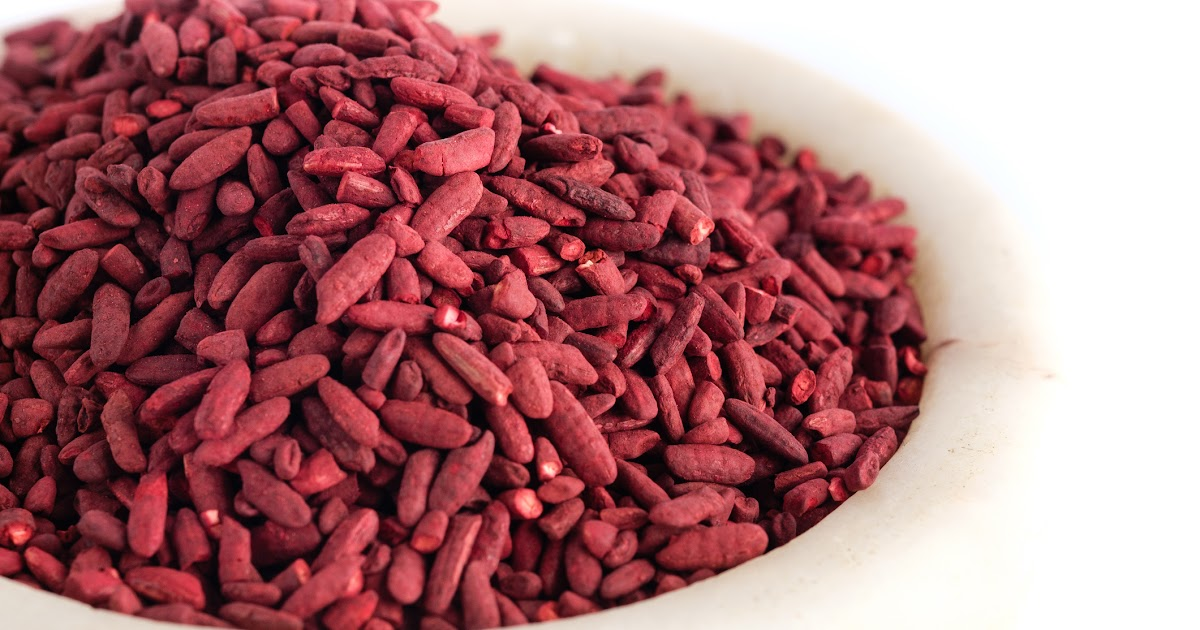
Red rice yeast 300g
White wine yeast 15g
Rock sugar 25g
Direction:
Clean rice then soak it in cold water overnight.
Bring the water to boil then add the rock sugar, cool to room temperature. Add the red rice yeast to the water and stir to mix well. Pour everything to a glass container.
Steam the rice over the water for about 20 minutes then let cool to only a little warm. if the rice is too hot you will get vinegar, not wine. If the rice is totally cold, it may not get fermented.
Put the white wine yeast into a zip lock bag and use a rolling pin to smash it to powder.
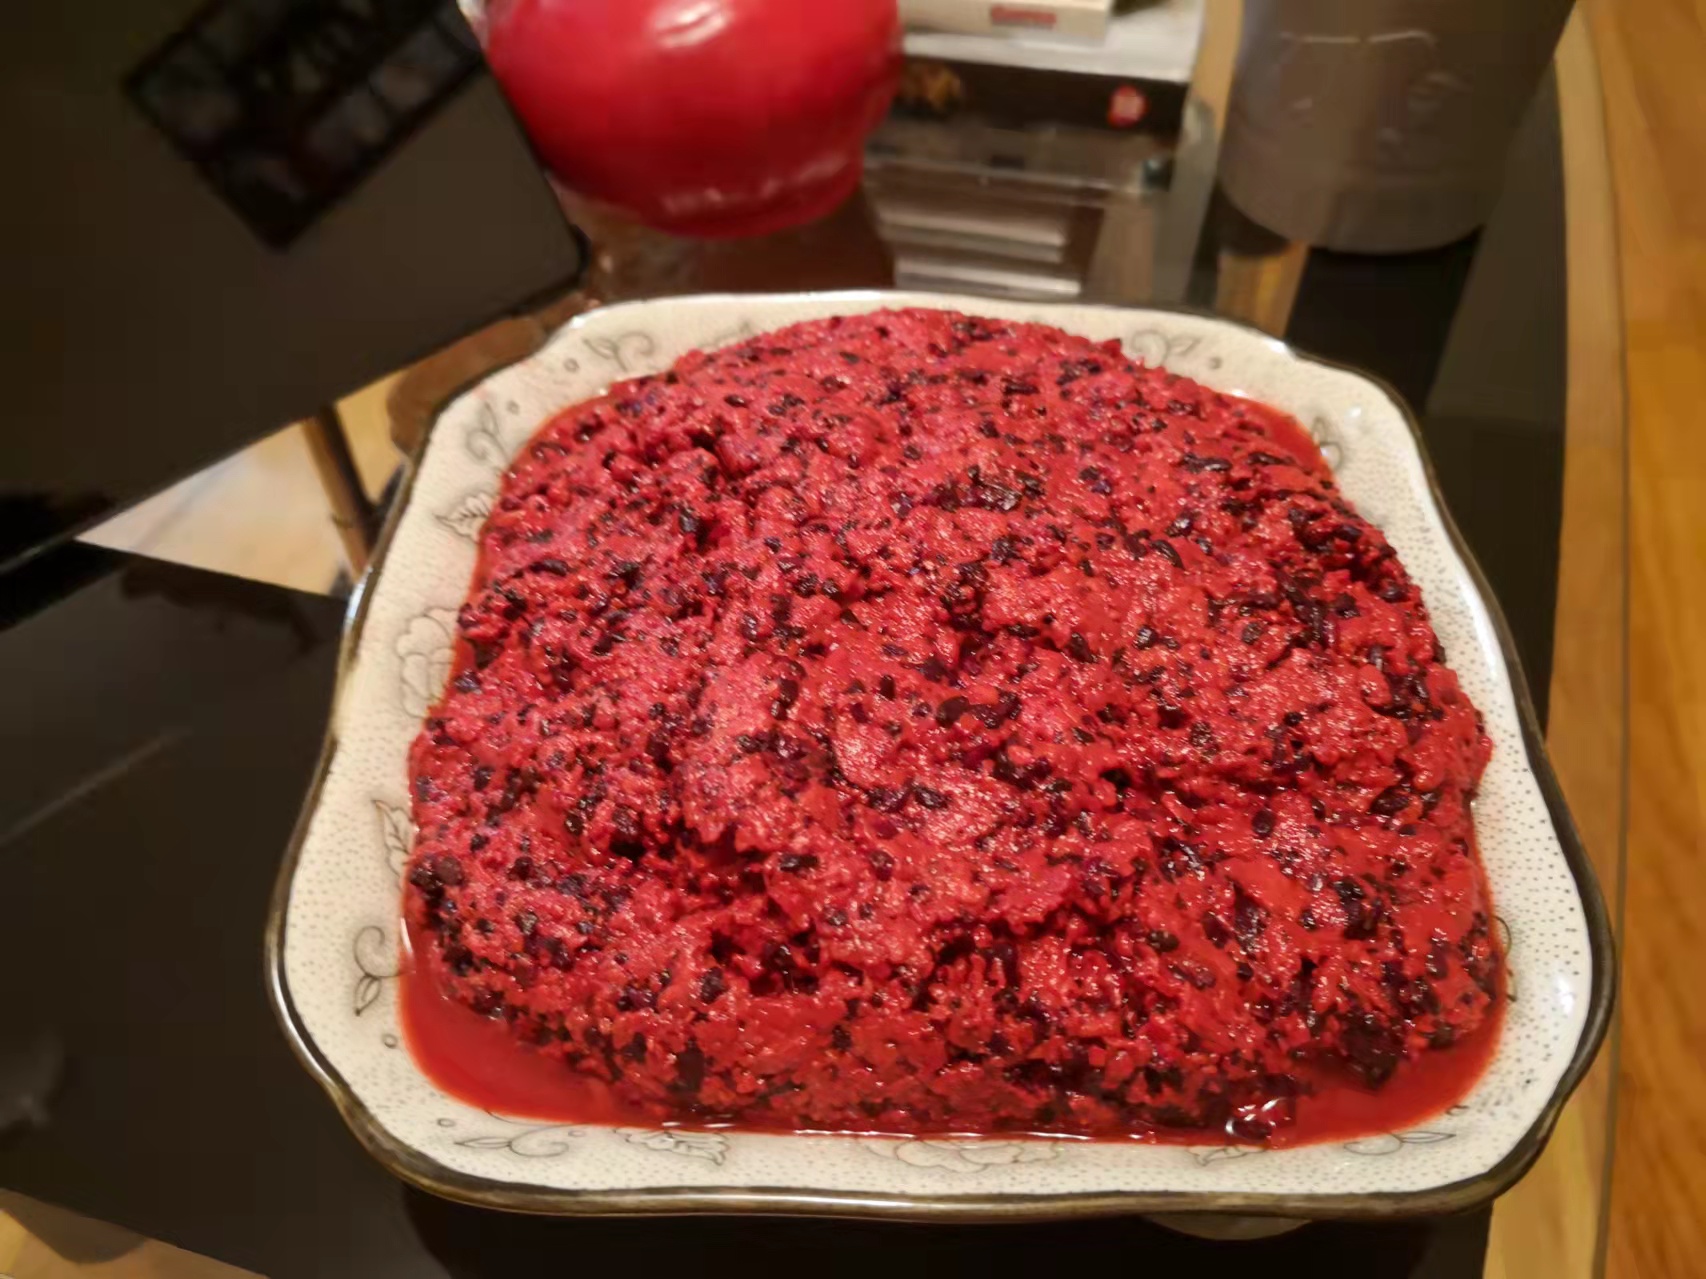
Add 1/3 of rice to the water and red rice yeast mixture, sprinkle 1/3 of the white wine yeast on the top, add 1/3 more rice to it and repeat the above procedure until everything is put in the container.
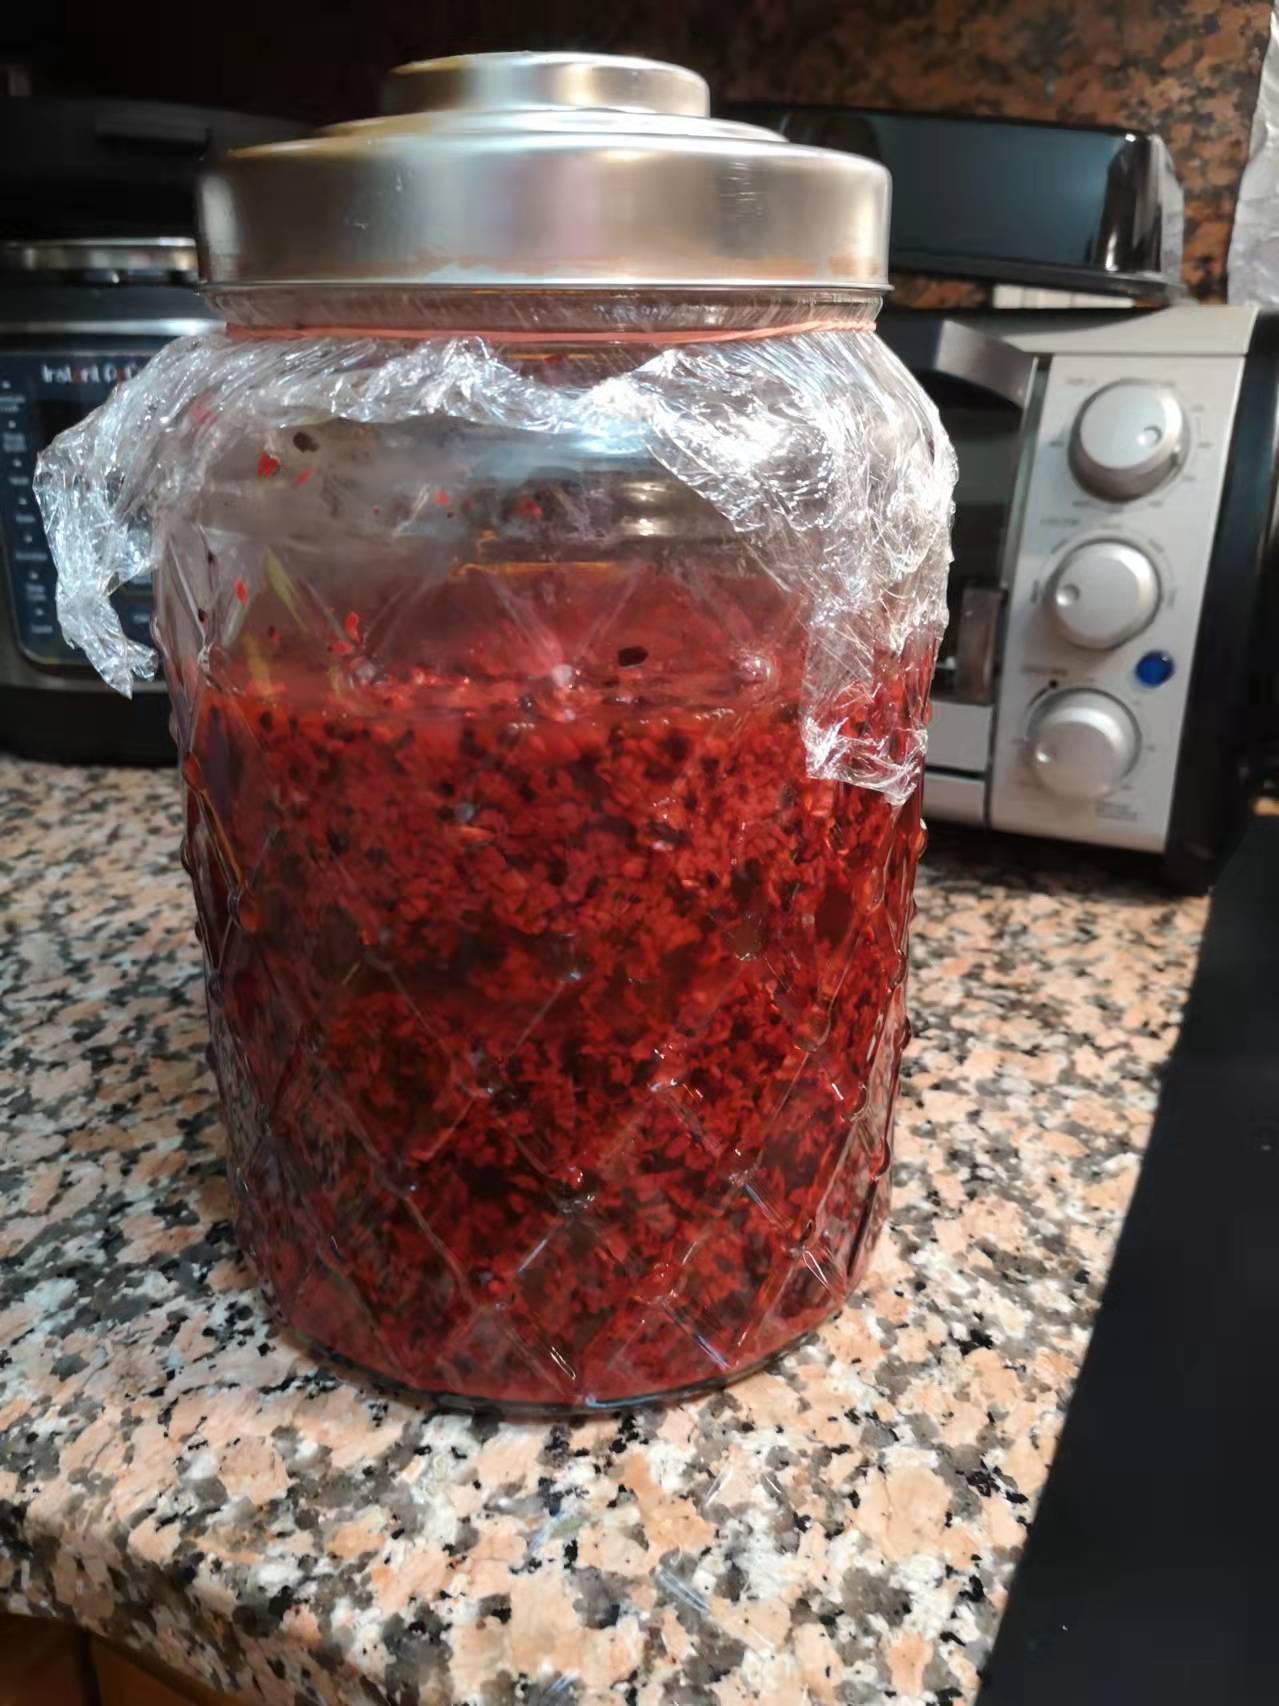
Use a plastic wrap to cover the container really well and used something to tie it up, then add the container’s lid on and tighten. put it to a place that is cool without sunlight (like somewhere in the basement)
5 days later use a clean spatula to stir the mixture to make sure everything is well mixed. close it tight and put back to the cool not sunlight place.
A month later, the wine is ready to drink or used as cooking wine and the anka sauce is also ready to use.
Use a strainer to separate the wine from the anka sauce/rice. Let the wine stay in a container for a day or so, then pour the wine to a separated container and leave the precipitation out. Doing so will prevent the wine turn sour, the precipitation on the bottom is Anka sauce/rice, after one month they need to be totally separated, otherwise they will continue to ferment until the wine turns to vinegar.

材料:
糯米 5磅
水 4.5誇脫
紅曲米 300克
酒饼丸 15 克
冰糖 25克
做法:
將米洗凈,然後用冷水浸泡一夜。
將水煮沸然後加入冰糖,冷卻至室溫。將紅曲米加入水中,攪拌均勻。將所有東西倒入玻璃容器中。
將米隔水蒸約20分鐘,然後冷卻至略微有点温热。注意如果米饭太热,酒会变酸, 如果太冷可能发不起来。
將酒饼丸子放入拉鍊鎖袋中,然後用擀麵杖將其压成粉末。
將1/3米饭加入水和紅曲米混合物中,在頂部撒上1/3的酒饼粉末,再加入1/3米饭,然後重複上述步驟,直到所有東西都放入容器中。
用保鮮膜將容器口包好,並用一些绳子將其綁起來,然後加上容器的蓋子並擰緊。把它放在一個阴凉沒有陽光的地方(比如地下室的某個地方)
5天后,使用乾淨的勺子攪拌混合物,以確保所有東西都混合均勻。再包緊,放回涼爽没有陽光的地方。
一個月後,青红酒可以飲用或用作烹飪,酒糟也可以使用。
使用一个过滤勺將酒和酒糟/米飯分開。讓酒在容器中放一天左右,然後將酒再倒入到另外的容器中,將沉澱物留出。這樣做可以防止酒變酸,底部的沉澱物是酒糟,一個月後它們就需要完全分離,否則它們將繼續發酵会将酒變成醋。