Chinese Jujube And Walnut Muffin/紅棗核桃糕

IMG_7080

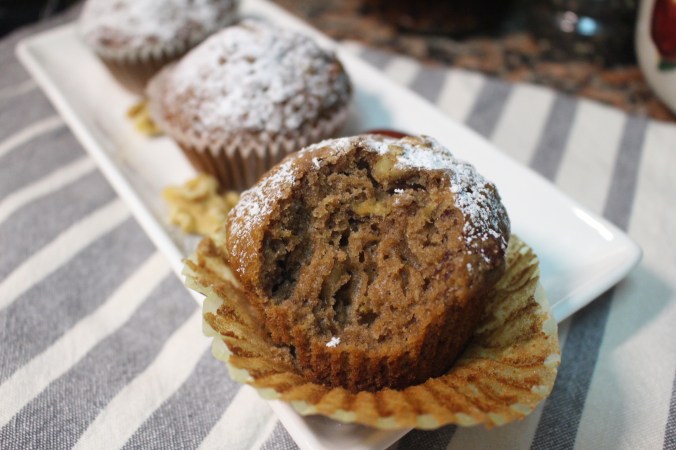
This is not Muffin, well at least it is not American muffins. I don’t have a name for it, let’s call it Chinese jujube and walnut muffin then. I have a good friend in Taiwan who owns a big bakery store, she gave me this recipe and taught me how to make it. But the recipe was for a store, I don’t need to make that many at a time, so I adjusted it a little bit and use less oil too.

Eggs 188g

Sugar 206g

Honey 19g

Cake flour 200g

Coco powder 7.5g

Baking powder 1.5g

Baking soda 1.5g

Pitted Jujube 10 pieces (big size)

Evaporated milk 135ml

Oil 110g

Walnut 50g

preheat oven to 390F

  1. Add baking soda, baking powder and coco powder to the flour and sift.
  2. Roughly chop the jujube and walnut into smaller size or use a food processor to do it. If your jujube is very dry, then add the jujube to the evaporated milk for 15 minutes.
  3. Add egg, sugar, honey and oil together and mix.
  4. Add jujube with evaporated milk and half the walnut to 3 and mix well.
  5. Add 4 to 1 and mix again. Don’t over mix it.
  6. Prepare your muffin tin by adding the cupcake liners. Evenly divide batter into the liners cups, then add the rest of walnut to the top of the muffins. Bake about 20 minutes, when you stick a toothpick to the center and it comes out clean it is ready.

IMG_7087

IMG_7076

這不是松餅,至少不是美國的松餅。我沒有名字,我們就叫它中國紅棗核桃松餅吧。我在臺灣有一個好朋友,她開了一家很大的面包店,是她給了我這個食譜,還教我怎麼做。但食譜是給店裏做出來賣的,我就是自己吃不需要一次做這麼多,所以我調整了一點點,也為了健康使用更少的油。

雞蛋 188克

糖 206克

蜂蜜 19克

蛋糕麵粉 200克

可可粉 7.5克

烘焙泡打粉 1.5克

烘焙蘇打粉 1.5克

無核紅棗 10 顆(大隻的)

淡奶 135毫升

油 110克

胡桃木 50克

預熱烤箱至390F 華氏度

  1. 將小蘇打粉、泡打粉和可哥粉加入麵粉拌匀過篩。
  2. 稍微切碎紅棗和核桃成或使用食品加工機來切。如果你的紅棗很乾,那麼在淡奶中加入紅棗泡15分鐘。
  3. 將雞蛋、糖、蜂蜜和油加在一起混合好。
  4. 加入紅棗與淡奶和一半的核桃到3裏面拌匀。
  5. 將 4 添加到 1裏面,然後再次拌匀。注意不要過度攪拌它以防做出來的瑪芬不鬆軟。
  6. 加紙杯到瑪芬盆裏面,將麵糊均勻地分到紙杯裏,然後將剩下的核桃放在松餅頂部。烘烤約20分鐘,當你把一根牙籤插到中心,拔出來的時候是乾净沒有麵糊粘連著的話就是好了。

Japanese Rice Balls/日本飯糰

I’ve been watching Masa’s cooking a lot recently, I love his cooking because all the food he cooks looks so pretty and delicious. It is been raining whole day today, so I decided to make his rice balls at home since I couldn’t go out anyway.

IMG_7113

IMG_7099

Sushi rice 1 cup

Green peas 20 pieces

Roasted seaweed sheet 1 piece

Seasoned Capelin roe 3 tbsps

Cooked Salmon fish 4oz.

Mayonnaise 2-3 tbsps

Instant dried seaweed 1 tbsp

Rice seasoning 2 bags

Direction:

Cook the rice in a rice cooker.

Use a fork to break the salmon fish into smaller pieces then add mayonnaise and mix well.

Add some hot water to a small bowl then add the instant dried seaweed, drain the water after a few minutes. Make sure the seaweed is as dry as possible.

When the rice is ready add 1/2 tsp salt to the rice and mix well. Start making the balls when the rice is still warm, if you wait till the rice is cold then they wont stick together.

Add one bag of seasoning and peas to 1/4 of rice and mix well in a bowl. Wet your hands with a little bit of water so the rice won’t stick to your hands. Get 1/4 of rice out of the bowl, spread them in the middle of your left palm, add some salmon to the center, then get another 1/4 of rice from the bowl to cover it up. Fold your palms together to shape the rice to any kind of shape you like.

Add seaweed and Capelin roe to another 1/4 of rice in a bowl, then repeat the steps as above.

After you are done with all of them, use a scissor to cut the roasted seaweed into different strips, then use them to wrap around the balls we just made.

This is really something fun and easy to make.  You can do any kind of shape and size. You can make something else to wrap inside the balls. It will be a lot of fun if your children join you too!

WeChat Image_20191027203603.jpg

IMG_7121

IMG_7118

IMG_7103

IMG_7109

Beef With Mixed Vegetable Soup/牛肉湯

IMG_7059.JPG

It is getting colder now, and soup comes to mind as one of my favorite dishes.

Today I made beef and mixed vegetable soup because I have so many vegetables at home.

Beef 12oz.

Celery 2 stalks

Carrot 3.5 oz.

Onion 1/2 (medium size)

Corn 1 medium size

Can red bean 7oz.

Cauliflower 5oz.

Potato 1 medium size

Home made chicken broth 1.5 quarts (no salt)

Shallot 1 big one

Garlic 2 cloves (minced)

Bay leave 2 pieces

Tomato paste 3 tbsps

Cut all the vegetable and beef to bite size.

Add 2 tables vegetable oil to a skillet, add onion, shallot and tomato paste and saute for a few minute until tender and aromatic, add the rest of vegetables except bean.

Saute the vegetables for a few minutes, add broth, 2/3 tsp salt and bay leaves. Turn the heat down to medium small and cook with a lid on for about 20 – 25 minutes.

Add bean and Beef and turn the heat to high and continue to cook about 5 minutes.

Season with more salt and black pepper to taste if needed.

Tips:

The reason I only cook bean and beef for 5 minutes is because I used can bean, it is cooked and I used really good quality beef which is very tender, I didn’t want to ruin it.

You can use any kind of vegetable you like.


Chicken Wings With Fried Tofu Skin/腐竹鷄翅

IMG_6923

Fried tofu skin 5 oz.

Chicken wings 2pieces (medium size)

Chinese basil 15 leaves

Ginger 5 slices

Water 6 tbsps

Dark sesame oil 2 tbsps

Rice wine 2tbsps

Light soy sauce 1.5tbsps

Dark soy sauce 1tsp

This dish is similar to 3 cup chicken, but I added the fried tofu skin to it. I will soon cook the 3 cup chicken so you can compare.

Chicken wings cut into smaller pieces.

Heat up a skillet then add the sesame oil to it and fry ginger in the oil until golden brown.

Add wings to the skillet and stir fry until the edges of meat is also golden brown.

Add the rest of seasonings, tofu skin, water and 8 pieces of leaves to the pan, turn the heat to medium and cook it with a lid on for about 5 minutes.

Add the rest of leave to the chicken and mix well, turn the heat off.

Pig Stomach with Mixed Vegetables/雜菜炒豬肚

IMG_6972

Pig stomach 10oz.

Mixed vegetables 2-3 cups

Wash the pork stomach, then boil it in a few cups water with 2 slices of ginger and 2 tbsps cooking wine until tender ( it may take a while because pig stomach can be very chewy) . I cooked it in pressure cooker for about 8-10 minutes with the bean setting.

After the stomach is fully cooked, cut into smaller pieces.

If you use cauliflower too, make sure you boil it in water for 2-3 minutes first because it takes longer time to cook.

Add 2-3 tbsps cooking oil in a hot skillet, add all the vegetables, saute for a few minutes until tender, then add 2/3 cup home made broth or water.

Bring everything to a boil, add 2-3 pinch of salt to the taste, 1/2 tsp white pepper, 2tsps sugar, mix well.

Thicken the sauce with some starch water. Add 1.5 tbsps white rice vinegar at the end and mix well.

Steam Bun With Beef/牛肉夾包

I was making braised beef for noodles, but I made kind of too much, and at the end I didn’t feel like to eat it with noodles anymore, so I came up with this idea. This kind of bun is called lotus leaf buns for the shape, there is this famous dish people love to eat it with peking roasted duck.

IMG_6957.jpg

First of all we will need some braised beef. Here is the link for it:

https://caiqinchen.com/2017/08/31/braise-duck%e5%8d%a4%e9%b8%ad/

Of course you can stuff the buns with any kind of meat you like.

Steam the buns in a bamboo steamer for a few minutes, if you don’t have one just steam them over water will be fine too.

I added thin slice cucumber, scallion and cilantro to it too. The other very important ingredient here is hoisin sauce. I didn’t make the buns myself, they are store bought. You can get them from Chinese supermarkets.

Image result for 荷葉包

IMG_6952

IMG_6946

Here is pork with hoisin sauce, this dish will be good to stuff inside the buns too.

https://caiqinchen.com/2015/02/23/pork-with-hoisin-sauce%e6%b5%b7%e9%b2%9c%e9%85%b1%e8%82%89%e4%b8%9d/

IMG_6966

Stuffed Squid/魷魚卷

I want to apology to everyone who is still coming to see my blog for not posting anything in such a long time. I will try to come back a little more.

IMG_6976

I made this squid stuffed with fried rice a few days ago, and I would like to share it with you. This is a HUGE fish weighted almost 1.5 pounds. You can stuff it with other stuff  too, it doesn’t have to be fried rice. I’ve seem people make vegetables with ground meat too. If you do make it with Fried rice, you can add meat to it will be great too. I used only half the fried rice.

Squid 1.5 pounds

Sweet rice 1 cup

Some different color bell pepper for color

2-3 pieces of dried mushroom

A few pieces small dried scallop

Scallion (thinly cut)

One shallot (Finely cut)

Minced ginger 1tsp

Sweet baby Swiss cheese 3 Oz.

IMG_6980

Direction:

Soak the dried scallop and mushroom in water ( after cleaning )over night. Soak the rice over night too in a separated bowl.

Pull the squid’s head out of the body, peel the skin off then the tail too. Clean the fish inside and out. Marinate the fish with 1/3 spoon salt and 3tbsps white wine for 1 hour.

Steam the rice over the water for about 10 to 15 minutes, let the rice cool down a little bit.

Add 2 tbsps oil in a skillet and heat it up, add shredded mushroom, scallop, ginger and shallot first and saute for 2-3 minutes then add the rice and mix well, add 1/4 tsp salt and some black pepper.

After everything is mixed, turn the heat off. Then add the bell pepper, scallion and cheese and mix with everything.

Get the fried rice to a bowl and let it cool down to the room temperature.

Stuff the squid with the fired rice to almost full, make sure you use a spoon to push the rice down. use 2 toothpicks to close the fish. Brush the fish with a little bit of oil.

Bake the squid in the preheat oven 375F for about 20 minutes.

Serve the fish when it is still hot, you can add some lemon juice to it. ( I didn’t)

IMG_6986

這是我幾天前做的魷魚塞飯,我想和大家分享。這是一條重近1.5磅的大魷魚。你也可以塞其他的料進去,不一定非是炒飯。我看也有人用碎肉炒蔬菜來做。如果你用炒飯做你可以加肉,這裏我只用了一半的炒飯來塞。

魷魚 1.5 磅

糯米 1 杯

一些不同顏色的甜椒取其顔色

2-3片乾香菇

幾粒乾貝

一條青蔥切葱花

薑蓉 1茶匙

瑞士乳酪3盎司

做法:

把乾貝和香菇浸泡在水中( 清潔後)過夜。 把米也泡一晚

把魷魚的頭從身體里拉出來,把皮剝掉,然後把尾巴也剝下來。清潔魚內外。用1/3勺鹽和3湯匙白葡萄酒醃魚1小時。

將米蒸約10至15分鐘,讓米飯冷卻一點。

加2湯匙油到鍋裏,加熱,加入切碎的香菇,乾貝,生薑和青蔥炒2-3分鐘,然後加入米飯,混合好,加入1⁄4茶匙鹽和一些黑胡椒。

混合後關火。然後加入甜椒,蔥和乳酪,並拌匀。

把炒飯放在碗裡,讓它冷卻到室溫。

把炒飯塞到魷魚裏塞到8分滿,時不時用勺子把米飯往下推。用2個牙籤把魷魚的口封起來。用一點油刷一刷魚。

把魷魚放入預熱到375F華氏度的烤箱中烘烤約 20 分鐘。

趁熱吃!你可以加入一些檸檬汁來調味。(我沒有)